As flexibility is the basis of graphic design, clipping path in Illustrator provides you with the option of concealing or exposing image parts without erasing anything, and your creative potential is intact. It is particularly helpful in subject separation from backgrounds or in in-design speed adjustments. Whether it is a retouching of a picture or designing a customized layout, this feature guarantees you full authority over your pictures. This DIGI-TEXX tutorial will guide you through the basics. Keep reading and refine your Illustrator workflow today!

How to Make a Clipping Path in Illustrator?
How to create a clipping path in Illustrator will allow you to edit images accurately and achieve clean cut-outs. This technique employs a vector shape to hide some portion of an image and reveal only the desired section.
Open or Import Your Image
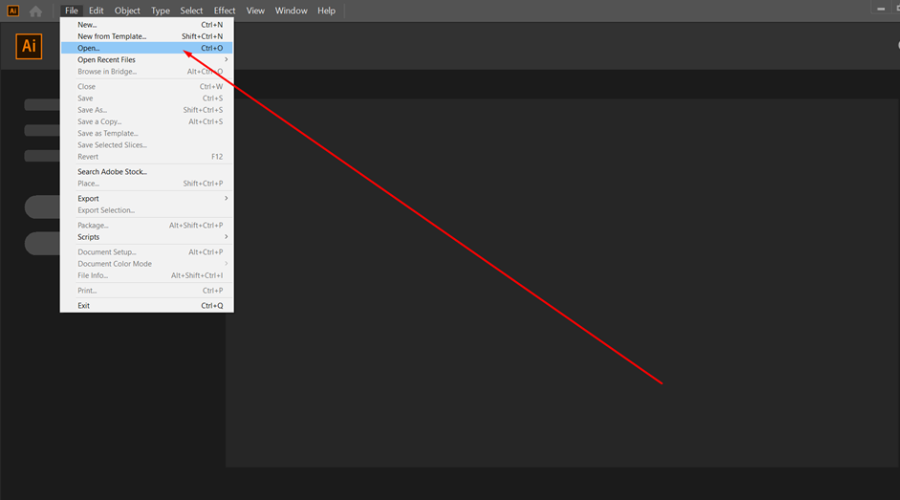
To start making a clipping path in Illustrator, create a new document and navigate to File > Place to place the image you wish to modify. This is the image upon which your clipping mask lies.

Create a new document and navigate
Create the Clipping Path Shape
Second, in the creation of a clipping path in Illustrator, use the Shape Tool or Pen Tool to create a closed path around the image area you wish to preserve. The path should be a vector shape.

Use the Shape Tool or Pen Tool to create a closed path
Position the Clipping Path Above the Image
One of the essential steps in creating a clipping path in Illustrator is placing the vector shape above the photo in the layers list. You can do it using the Layers panel or right-click > Arrange > Bring to Front.

Placing the vector shape above the photo in the layers list
Select Both the Path and the Image
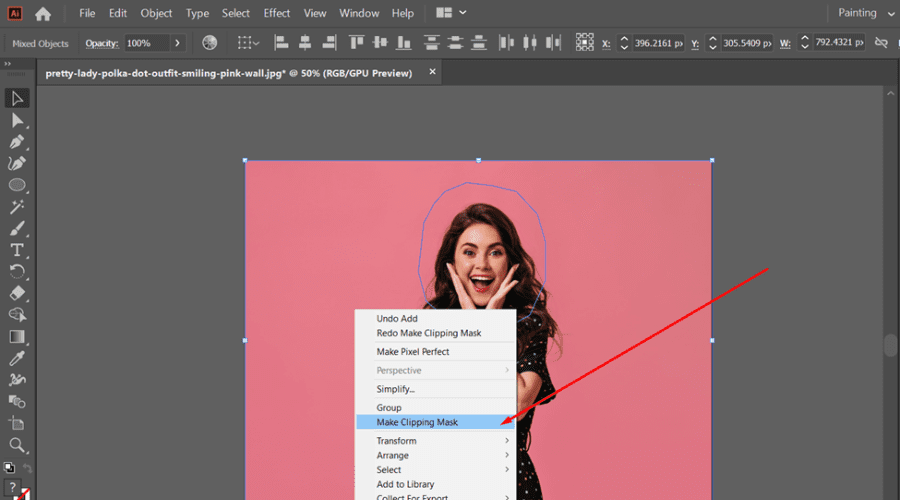
Choose the clipping path and the image separately by Shift-clicking on them, or using the Selection Tool. Do this before applying the clipping mask.

Choose the clipping path and the image separately
Create the Clipping Mask
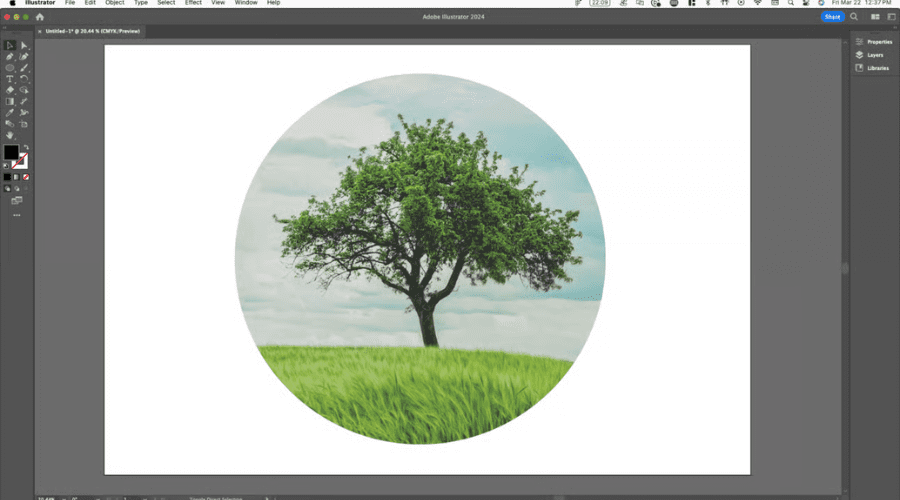
To finish off the tutorial on creating a clipping path in Illustrator, select Object > Clipping Mask > Make, or press Ctrl+7 (Windows) / Cmd+7 (Mac). The image is now masked to fit the shape of your clipping path.

The image is now masked to fit the shape
When to Use Clipping Paths?
It is half the battle to know how to create a clipping path in Illustrator, but it is just as important to know when to use it. Clipping paths are extensively applied in design, photography, and online marketing for the following reasons:
- Removing Backgrounds: The clipping path is ideal to isolate a product from its background, hence ideal for online shops, catalogs, or marketing materials where there is a need for a clear and distraction-free image.
- Making Transparent PNGs and GIFs: When making web-friendly images, clipping paths become part of making images that have transparent backgrounds. This enables your graphics to sit nicely within a variety of website layouts and designs.
- Product Photography: Clipping paths are probably most often utilized within Illustrator for product photography. They enable accurate cutouts so that you can place products within new environments or merge them into composite images without any residual background noise.
- Graphic Design Projects: Clipping paths separate a logo, icon, or design element, and assist in removing certain elements from intricate artwork without compromising crisp, clean edges.
- Dealing with Challenging Backgrounds: With images containing intricate or multi-colored backgrounds, clipping paths provide better precision than standard image masking, particularly when dealing with subjects with precise edges.
- Print-Ready Cutouts: Pure cutouts are unavoidable in print preparation. A clipping path provides spotless, sharp results that appear excellent on paper materials.

Clipping paths are extensively applied in design, photography
Tips for Better Clipping Paths in Illustrator
Once you understand the fundamentals of making a clipping path in Illustrator, streamlining your process through precise methods and intelligent tools can get your design tasks completed faster and more neatly. Here are some real tips to work more effectively:
- Enable Smart Guides: Activate Smart Guides (View > Smart Guides or Ctrl/Cmd + U) to snap path segments and anchor points automatically. This will assist you in creating paths more intuitively and harmoniously.
- Practice the Pen Tool: Becoming proficient with the Pen Tool is a requirement while learning to create a clipping path in Illustrator. The earlier you practice it, the more proficient you’ll be at adding anchor points and controlling curves using handles.
- Use the Direct Selection Tool: After drawing your path, use the white arrow (Direct Selection Tool) to tweak individual anchor points or curve segments for fine adjustments.
- Turn on Snap to Point: Enable “Snap to Point” (View > Snap to Point) to keep paths aligned with key reference points, which is especially helpful when working with geometric or symmetrical layouts.
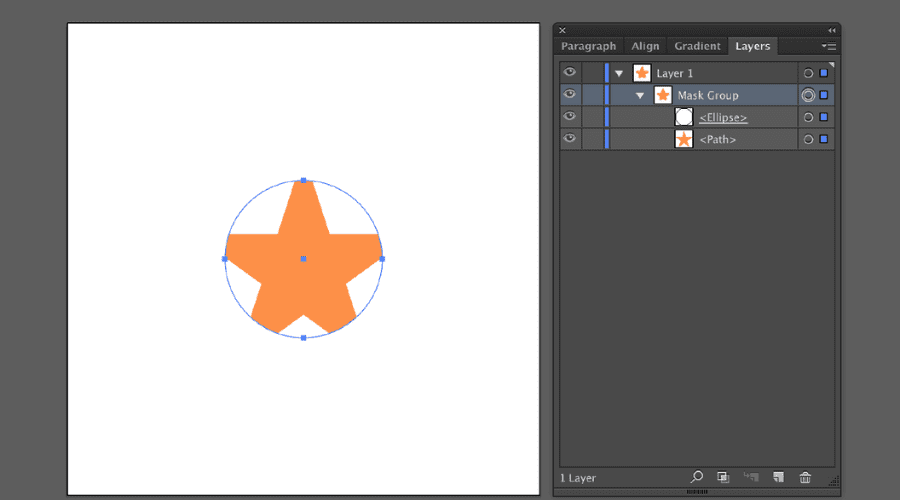
- Edit Inside Clipping Masks with Isolation Mode: Double-click on a clipping group to go into Isolation Mode, where you can edit what’s inside the clipping mask without modifying the mask itself.
- Use Feathering for Soft Edges: For smooth visual transitions, use feathering on your clipping mask (Effects > Stylize > Feather). This creates soft edges of the mask and provides a natural look.
- Create Compound Paths for Intricate Shapes: Under Object > Compound Path > Make, combine several paths into one clipping shape. Employ this feature when masking holes or multi-part objects.
- Release and Rebuild Clipping Masks When Necessary: When a lot of editing will be involved, release the clipping mask (Object > Clipping Mask > Release), make adjustments to single paths, and rebuild the mask after modification is complete.

Tips for better clipping paths in Illustrator
=> Or simply check out the video below for a quick demo:
=> You can also check out our article on top clipping path service providers if you’re looking to outsource this task efficiently.
Being able to create a clipping path in Illustrator not only improves your design, but it creates new areas of creativity in every element of online shop design, through to print design. Employing the correct tools, methods, and shortcuts along with each other, you can achieve professional-grade, clean cuts that elevate the quality of your work to new heights. If you’re looking to save time or need high-volume edits, you can also explore our clipping path services for professional, scalable results.
If you need to automate big-scale image editing or professional assistance in digital production, benefit from working together with DIGI-TEXX — a professional data processing and digital content solutions provider. With immense experience in dealing with complicated visual workflow, DIGI-TEXX assists companies in saving time and ensuring uniformity on all media channels.
=> Find out more:


