In portrait photography, the eyes are not only the focal point of the photo but also the place to convey the emotions and stories of the character. A pair of well-edited eyes can create a good impression on the viewer.
Therefore, mastering the techniques of retouching eyes in Photoshop is an essential skill for any photographer or photo editor. This process is not just simply brightening eyes in a photo, but an art of balancing between highlighting and retaining natural beauty.
In this article, we will guide you in detail on how to retouch eyes in Photoshop using professional methods.

How To Retouch Eyes In Photoshop?
The professional eye retouching process in Photoshop always prioritizes non-destructive techniques, meaning we will use separate layers and adjustment layers so that any changes can be easily tweaked or undone without losing the quality of the original image.

Open Photoshop and Prepare Your Image
Before starting, open the portrait photo that needs to be adjusted in Photoshop by right-clicking -> Open with Photoshop.
The best working habit is to immediately duplicate the background layer by pressing Ctrl+J (for Windows) or Cmd+J (for MacOS). This creates a copy of the original image for free editing without fear of damaging the original file. For a more scientific workflow, you should create a new Group and name it Eye Retouching. All layers related to retouching eyes will be placed in this group.
Brightening the Iris
Brightening the iris is the most basic step to enhance eyes in photo. We will use Curves to control the brightness in the most flexible and precise way. The specific steps are as follows
- Create Curves Adjustment Layer: In the Layers panel, click on the “Create new fill or adjustment layer” icon (half white, half black circle) and select “Curves”. A Curves properties panel will appear.
- Increase the brightness: Click on the midpoint of the diagonal line in the Curves graph and drag slightly up. The entire photo will be brightened within the limits of the iris area.
- Invert Layer Mask: Each Adjustment Layer comes with a white Layer Mask (meaning the effect is applied to the entire photo). Click on this Layer Mask and press Ctrl+I (for Windows) or Cmd+I (for MacOS) to invert this Layer Mask to black. When the mask turns black, the brightening effect will be completely hidden.
- Paint to brighten the iris: Select the Brush Tool (shortcut B). On the options bar, select Hardness 0%, reduce the Opacity to about 15-20% and Flow to about 50%, while editing make sure the foreground color is white. Now, zoom in on the subject’s eyes and gently paint over the iris area. Repeating the painting several times will help the brightening effect increase gradually, allowing the user to control the desired brightness precisely.

Add Dimension and Detail to Eyes
If the eyes are simply brightened, they will look very flat and lifeless. The next step is to use the Dodge and Burn technique to create lighting effects, create depth and highlight details.
- Create a Dodge & Burn Layer: Create a new layer (shortcut Ctrl+Shift+N or Cmd+Shift+N). In the dialog box that appears, set the blending mode to “Overlay” and check the Fill with Overlay-neutral color (50% gray) box.
- Using the Dodge Tool: Select the Dodge Tool (O), on the options bar, set the Range to Midtones and adjust the Exposure index to about 5-10%. Use this brush to lightly paint over the naturally bright areas of the iris, usually the lower half, to make them stand out more.
- Using the Burn Tool: Select the Burn Tool, keeping the settings the same. Use the brush to lightly paint over the dark circle around the outer rim of the iris (limbal ring). This will create contrast, making the eyes look sharper and have more depth.
- Highlighting the Catchlights: Catchlights are the soul of the eyes when adjusting the photo. Create a new blank layer. Select the Brush Tool (B) with a hard brush, very small in size. Choose white as the color and lightly dab on the brightest point of the available catchlight. Then, reduce the Opacity of this layer to blend the effect in the most natural way.
Cleaning Up Imperfections
A perfect pair of eyes needs to be cleaned up of small imperfections like red streaks or unnatural lighting. Here’s how:
- Create a new blank layer. (shortcut Ctrl + Shift + N on Windows and Cmd + Shift + N on MacOS)
- Select the Spot Healing Brush Tool (J).
- In the top options bar, check the box Sample All Layers.
- Now, click or paint over the red streaks in the sclera or any other imperfections to remove them. Doing this on a new layer makes it easy to erase any mistakes.

Final Touches
The final step is to sharpen the eyes to really make them pop. Here’s how to sharpen eyes in Photoshop effectively:
- Create a composite layer on top by pressing Ctrl+Alt+Shift+E (Windows) or Cmd+Option+Shift+E (Mac).
- Go to Filter > Other > High Pass menu. Set the Radius to a small value (usually 1-3 pixels) until you see the outlines of the eyes appear.
- Change the blending mode of this layer to Overlay or Soft Light.
- Add a black layer mask to this layer and use a soft white brush to paint over the irises, lashes and eyebrows to only apply the sharpening effect where needed.
Tips for Eye Retouching in Photoshop
To get the most out of your eye retouching in Photoshop, keep these steps in mind:
- Keep it natural: The key to professional retouching is subtlety. Don’t over-brighten or over-whiten the whites of the eyes as this will make the eyes look unnatural.
- Work non-destructively: Always use adjustment layers, blank layers and Smart Objects so you can easily change the parameters later.
- Pay attention to both eyes: Make sure both eyes are edited evenly for brightness, color, and sharpness to create balance.
- Zoom in and out constantly: Zoom in frequently to edit details and zoom out again to see the whole picture, making sure your edits blend with the entire face.
- Keep texture: When smoothing the areas around the eyes, be careful not to lose the natural skin texture. Anything too smooth looks fake.
- Light source is important: The position and shape of the catchlight must match the light source in the shooting environment.

Examples of Eye Retouching in Photoshop
Here are some examples of what you can achieve by editing eyes in Photoshop, each accompanied by a brief description of the technique used.
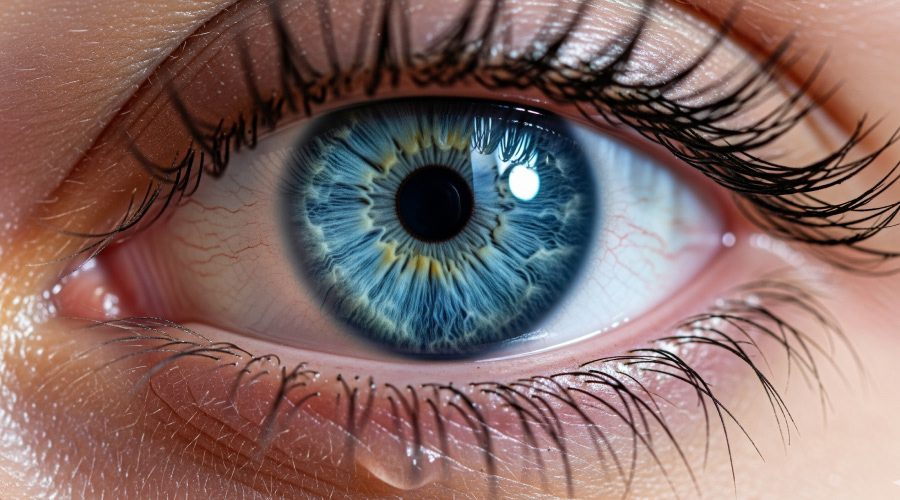
1. Enhance Catchlights for a Sparkling Effect
With this photo, the editor focused on highlighting the natural catchlights, giving the blue eyes depth and a captivating sparkle.

2. Iris Brightening
In this cinematic portrait, the editor used a Curves Adjustment Layer and mask to selectively brighten the irises. This technique makes the subject’s blue eyes stand out, shining and drawing the eye even in a relatively dark and moody setting.

3. Adding Depth and Sharpness
In this example, the Dodge and Burn technique has been used subtly to contour the iris and highlight the limbal ring. At the same time, a High Pass layer with the Overlay blending mode has been used selectively on the iris and lashes to enhance the sharpness, giving the eyes a sense of three-dimensional depth and life.

4. Brighten the Whites and Iris for a Clear Look
With this one, the editor focused on making the eyes look healthier and more awake. The ‘Curves’ technique was used with a Layer Mask to increase the brightness of the iris, making the eye color more radiant. The result is a bright, clean eye that immediately attracts the viewer’s attention while still maintaining a natural look.

5. Cleaning Red Veins and Sclera
This example demonstrates using the Spot Healing Brush Tool and a Hue/Saturation adjustment layer to remove red veins and clean up the sclera naturally. The result is a healthier, clearer-looking eye without being overly white, keeping it realistic and alive.

Conclusion
From basic to advanced techniques, it can be seen that retouching eyes in Photoshop is a process that requires meticulousness, technique and a delicate artistic eye. However, for businesses in the field of e-commerce, photography, or any industry that needs to process images in large quantities, investing time and resources to edit every small detail can become a big challenge.
With leading experience in the field of image processing and digitization, DIGI-TEXX is proud to bring professional photo editing services. Our team of experts not only has a deep understanding of complex retouching techniques but is also equipped with modern technology to ensure consistent quality across thousands of products in optimal time.
Contact DIGI-TEXX today. We are ready to advise and provide the most suitable solution for your needs.
=> Read more:


