In portrait photography, perfect skin has the greatest impact in the finished picture. Being able to retouch skin in Photoshop enables you to perfect natural beauty without losing a natural finish, avoiding the overdone airbrushed look. Using the appropriate tools and procedures, you can soften out blemishes, tone out color, and accent facial curves, producing professional-grade results that shine.
How to Retouch Skin in Photoshop?
The aim is not to remove all the details, but to make the image sharper without compromising the personality of the individual. Keeping this at heart, let’s remove the enigma of the five must-do steps to retouch skin in Photoshop for a pro-level outcome.
Step 1: Open Photoshop and Prepare Your Image
If you have cleaned up blemishes and imperfections already, your picture should already be open in Photoshop, so go to the next step of your skin retouching process.
If you’re doing a different image for skin softening, begin by opening Photoshop and opening a high-resolution picture. When you have opened it, copy the picture by utilizing Ctrl/Cmd + J.
Second, right-click on this copied layer and choose Convert to Smart Object. This will enable you to apply smart filters in a non-destructive manner, which is important for professional skin retouching. Then, copy the Smart Object layer again. Having two smart layers is a particular reason:
- The first Smart Object layer will later blur and smooth the skin.
- The replicated Smart Object layer still has the original skin texture, with all the original details.
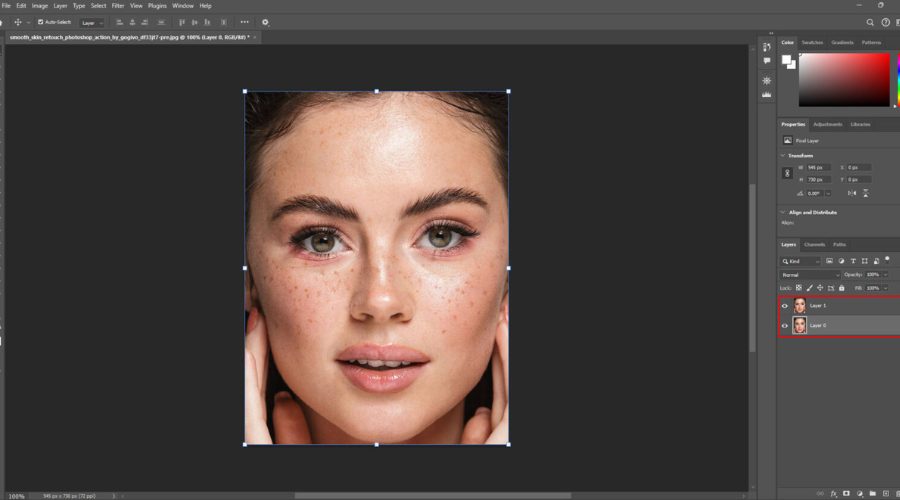
Copy the picture by utilizing Ctrl/Cmd + J.
Step 2: Remove Blemishes and Imperfections
Use the Spot Healing Brush to click on any blemish that you wish to erase. Photoshop immediately covers up the ruined texture with the smooth skin texture surrounding it and erases the imperfection from view.
To achieve the most natural-looking skin retouching Photoshop results, make your brush size just larger than the pimple itself. You can both enlarge and reduce your brush easily on your keyboard: to enlarge the size of it, press on the right bracket key ( ] ); to reduce the size of it, press on the left bracket key ( [ ]).
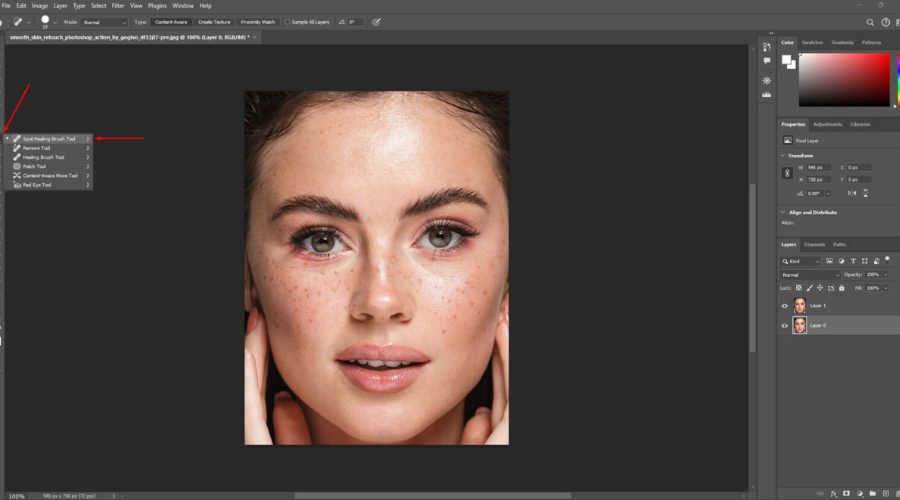
Use the Spot Healing Brush to click on any blemish that you wish to erase
If the spot is not erased the first time, press Ctrl+Z (Windows) / Command+Z (Mac) to reverse, resize your brush if necessary, and try again.
When trying to retouch skin in photoshop, remember that it’s fine to remove temporary issues such as pimples or small spots, but permanent traits such as moles or defining scars shouldn’t really be altered, as they’re a part of someone’s own signature appearance.
Finally, skin retouching is meant to improve one’s natural appearance and not change their identity.
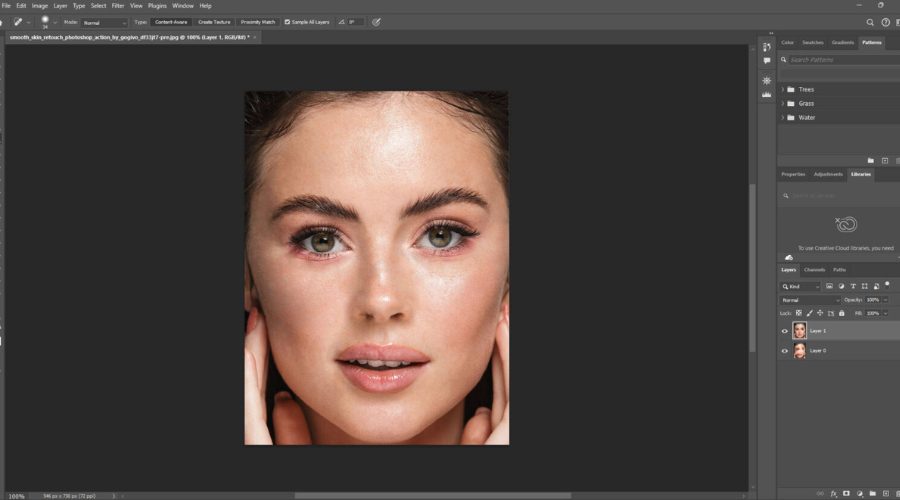
It’s fine to remove temporary issues such as pimples or small spots
Step 3: Smooth the Skin (Skin Texture)
To smoothen the skin texture without losing its natural texture, you can use Photoshop’s Smooth Skin Quick Action. Open your photo in Photoshop, navigate to the Discover panel (through the search icon or Ctrl/Cmd + F), then Browse > Quick Actions > Smooth skin, and Apply.
When you use it for the first time, you will need to download the matching neural filter first. This technique is quick and efficient in eliminating flaws such as fine lines or blemishes without compromising the overall texture, so it is a tried technique of skin retouching in Photoshop.
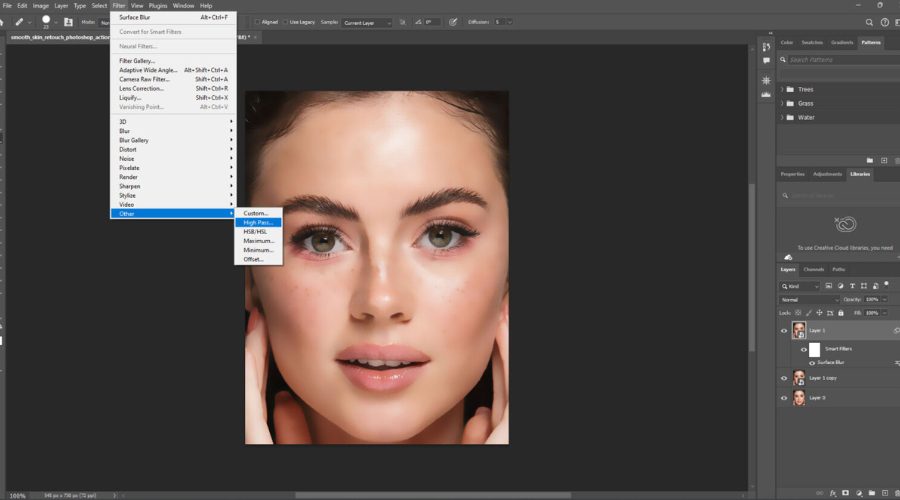
You can use Photoshop’s Smooth Skin Quick Action
Step 4: Even Out Skin Tone (Dodge & Burn)
A traditional and very effective technique of trying to retouch skin in Photoshop and evening out the skin tone is the Dodge & Burn technique using soft light or curves adjustment layers. Begin with a new layer using Soft Light blending mode (neutral gray fill).
Next, use a low-opacity soft brush with white to lighten dark areas (dodging) and black to darken highlight spots (burning). This gradually balances skin tone without losing detail. More control is used by professionals with Curves adjustment layers with masks, applying dodge and burn carefully to create realistic effects.
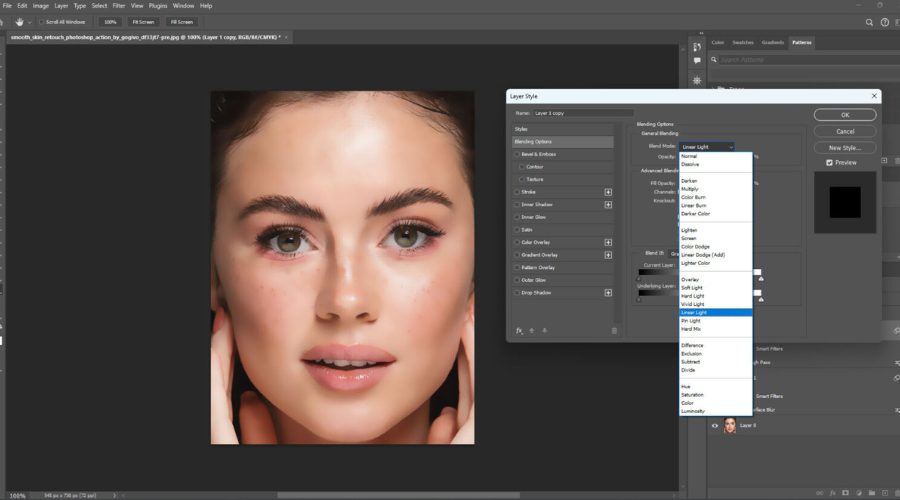
Dodge & Burn technique using soft light or curves adjustment layers
Step 5: Final Adjustments
When texture and tone are perfect, the final details can be added. Final touches are usually color correction, subtle blemish removal, and contrast adjustment to produce a pleasing look.
The majority of retouchers use this order of tasks: Blemish removal → Dodge & Burn → Frequency Separation → Color correction. This linear process maintains skin with a natural look, highlights, shadows, and tone blended, which is a crucial aspect of how professionals retouch skin in Photoshop.
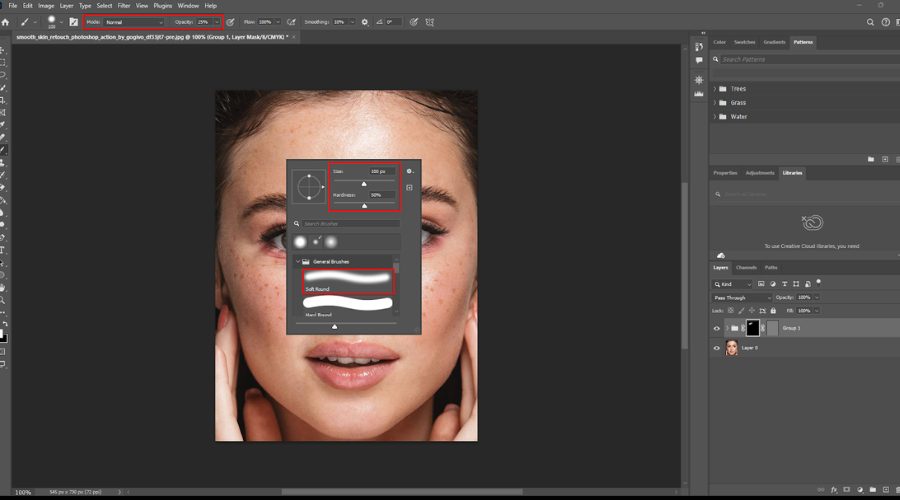
Final touches are usually color correction, subtle blemish removal
AI Tools in Photoshop for Skin Retouching
New Photoshop skin retouching is quicker and more accurate due to AI tools. No longer do you spend hours of hand-eye work, but now you can count on AI skin retouching techniques to assist you with keeping the outcome natural and real-looking. The following are the most important AI tools that everyone needs to understand:
- Neural Filters – Skin Smoothing: This smart AI filter smooths blemishes, wrinkles, and texture at a click while not losing natural details. One of the quickest methods to retouch skin in Photoshop for a professional appearance.
- Neural Filters – Smart Portrait: Above and beyond simple skin adjustments, this tool allows you to refine facial expressions, light conditions, and age without losing personal details. It introduces creative flair to Photoshop skin retouching.
- Remove Tool (Artificial Intelligence-based): Ideal for the elimination of distraction or major blemishes, this tool has AI fill out desired areas with neighboring pixels naturally, fluidly, and seamlessly, making your skin feel smooth and natural.
- Select Subject (AI Selection): Adobe Sensei-powered, it automatically selects and detects the prominent subject in your photo. It is efficient and isolates the skin areas for precise retouching.
- Content-Aware Fill (AI-enabled): AI support allows this tool to eliminate undesirable objects and fill in the chosen region with corresponding textures and tone to hide the edit.
- Camera Raw AI Masks: Adobe Camera Raw AI masking provides easy selection of facial or skin regions without hassle. Use it when making global adjustments prior to going into specific Photoshop skin retouching.
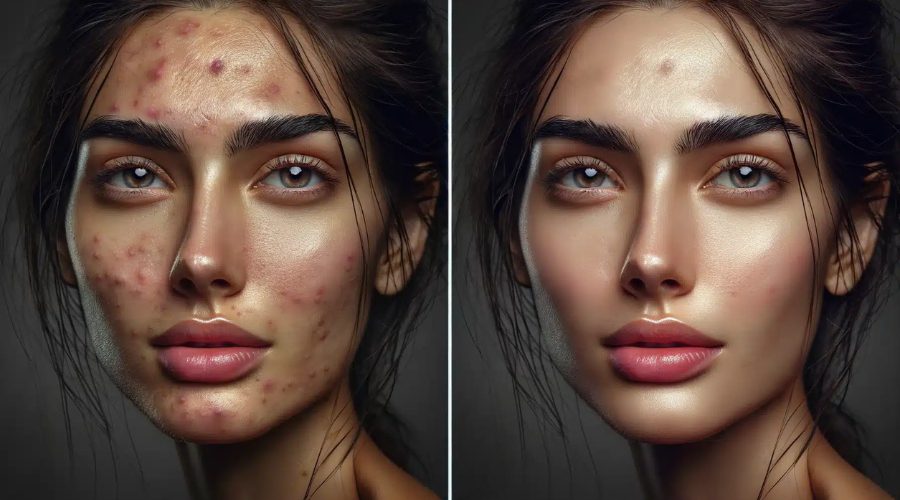
New Photoshop skin retouching is quicker and more accurate due to AI tools
=> See more: Best AI Photo Retouch Apps You Should Try
Quick Tips for Natural Results
As you retouch skin in Photoshop, your aim should be to add beauty without sacrificing reality. Too much editing will result in plastic or unnatural-looking skin, and thus a natural equilibrium is required. Below are some important tips to achieve professional yet subtle skin retouching:
- Maintain Skin Texture: Retain pores, tiny details, and natural texture to prevent too-plastic-looking skin.
- Don’t Over-Smooth: Use only sufficient smoothing to eliminate blemishes, without eliminating facial character or natural creases.
- Balance Skin Tone: Adjustment layers or Dodge & Burn can be used to balance skin tones without sacrificing total depth.
- Work with Low Opacity: Using the Healing Brush or Clone Stamp, work on a lower opacity for more delicate, natural blending.
- Pay close Attention to Lighting: Use skin retouching to the direction and tone of the natural light so that the result will look natural.
- Check the Image at Different Zoom Levels: Zoom out occasionally to verify your edits are natural when viewed in full.
- Do Subtle Color Grading: Perform subtle color corrections to achieve even skin tones, not unnatural orange or pink hues.
Too much editing will result in plastic or unnatural-looking skin, and thus, a natural equilibrium is required
=> You might like: High-End Beauty Retouching: Techniques and Tips
While working on skin retouching, don’t forget the eyes — you can check out this guide on how to retouch eyes in Photoshop to make portraits look even more engaging.
Beyond skin work, it’s also important to refine the overall look of the photo; here’s a step-by-step tutorial on how to edit portraits in Photoshop for a polished final result.
The technique behind learning to retouch skin in Photoshop is finding the balance between enhancement and realism. With the proper tools and techniques, you can not only enhance natural beauty but also preserve texture and originality, making your portraits professional and realistic.
Should you require professional assistance beyond personal editing, DIGI-TEXX has expert photo post-production as well as editing services specially crafted to meet diverse business needs. Our proficiency guarantees regular, effective, and natural outcomes, sparing your time and meeting professional standards. For professional results beyond DIY editing, you can explore our Photo Retouching Services to give your images a flawless finish.


