The light and airy photos are becoming a trend, as it is suitable for shooting concepts ranging from wedding photos and family portraits to product and culinary photography. Light and airy is characterized by bright tones, creating a sense of clarity and softness. This style brings a delicate, romantic, and vibrant beauty.
However, to achieve perfect results, it not only depends on shooting techniques but also requires meticulousness in professional post-production. In this article, DIGI-TEXX will guide you through 7 simple tips to effectively edit photos in the light airy style.

Prioritize Soft, Diffused Lighting
The elements to create a light and airy photo do not come from editing software, but mostly from the light source when taking photos. Soft, diffused light is key, creating a smooth transition between light and dark areas, eliminating harsh shadows, and bringing a soft feel to the objects in the photo.
To get the ideal light source for this style, you should prioritize shooting at times with the most beautiful natural light. The golden hours for taking a good photo are the times right after sunrise and before sunset. The light at these times will be warm, low intensity, and slanted, creating soft shadows.
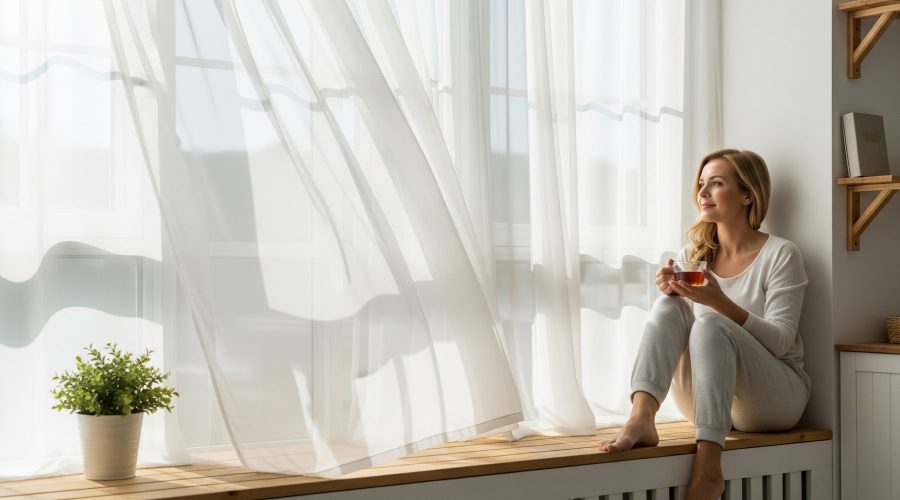
In case you are shooting indoors, make the most of the light from the window. Place the subject near the window but avoid direct sunlight. A thin white curtain can become an effective light diffuser. In the case of studio photography or when natural light is not enough, the use of specialized diffusers such as softboxes, umbrellas or reflectors is extremely necessary.
Adjust Exposure and Brightness for an Airy Base
So after having a good original photo with good lighting, the first step in the image processing process is to post-edit a bright and airy photo base. The goal here is to make the entire photo look a little brighter than it actually is, but make sure not to lose detail in the highlights. You can refer to the following parameters to adjust:
- Exposure: This index will affect the entire tonal range of the photo, from darkest to brightest. Increase Exposure gradually until the photo reaches the desired overall brightness. A little tip is to keep an eye on the Histogram; you want to move it mostly to the right but avoid having it peak at the right edge, as this means that the highlights are blown out and lose detail.
- Brightness: While Exposure affects the entire image, Brightness mainly affects the mid-tones. After adjusting Exposure, you can use Brightness to fine-tune the brightness of your subject and key areas without affecting the darkest and brightest areas too much.
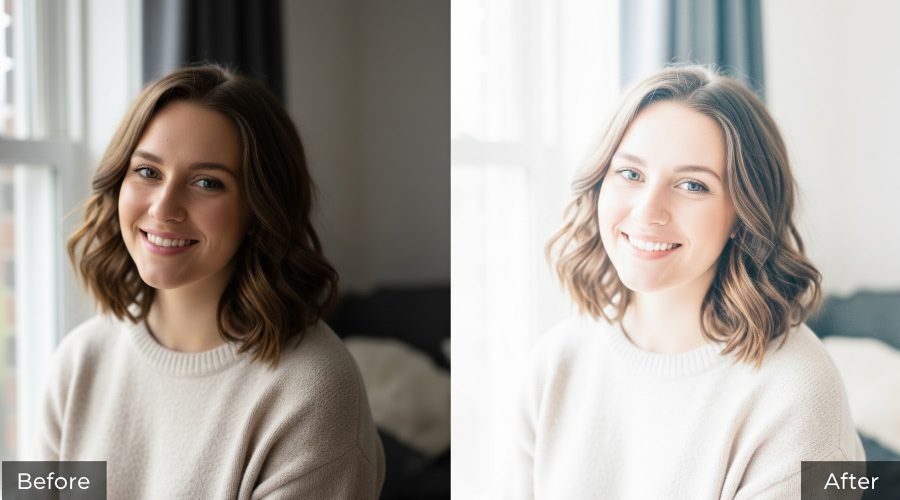
- Contrast: Reduce the Contrast of your photo to soften the subject. The light airy style tends to avoid high contrast and harshness. Reducing the Contrast will help the transition between tones become smoother, creating a soft, gentle feel to the photo.
- Whites: Increasing this value will make the brightest areas in the image brighter, contributing to the airy feel.
- Blacks: Instead of reducing this value to create depth (as is common in other photo styles), increase it slightly. This will lift the darkest areas, making the blacks in the image no longer pure black but dark gray. This helps remove the heavy feeling and makes the entire image lighter.
Reduce Contrast and Boost Whites for Softness
Although mentioned in the previous step, adjusting contrast and whites is key to creating the characteristic light and airy look. In this step, we will take a closer look at balancing these elements for optimal effect.
The goal of adjusting these parameters is not to completely eliminate contrast, as this will make the image flat and lifeless. Instead, you want to find a delicate balance. Once you have reduced the overall Contrast, use the Tone Curve tool for more precise control. The Tone Curve will give you an overview of how to adjust the brightness and contrast of specific areas (shadows, mid-tones, highlights) independently.
So to create a soft look, create a very slight S-shaped curve. Raise the bottom of the curve (shadows) slightly to brighten the dark areas and reduce the depth of black. Then, lower the top of the curve (highlights) slightly to soften the brightest areas, preventing them from becoming too harsh. This combination creates a subtle local contrast, helping the subject stand out while keeping the overall image soft.
At the same time, increasing the Whites index needs to be done carefully. Increase this index to the point where you see the brightest areas (like clouds in the sky, white wedding dresses) become bright and pristine, but immediately stop before they start to lose detail. This ensures your photo has clarity without sacrificing image quality.
Add Dreamy Effects
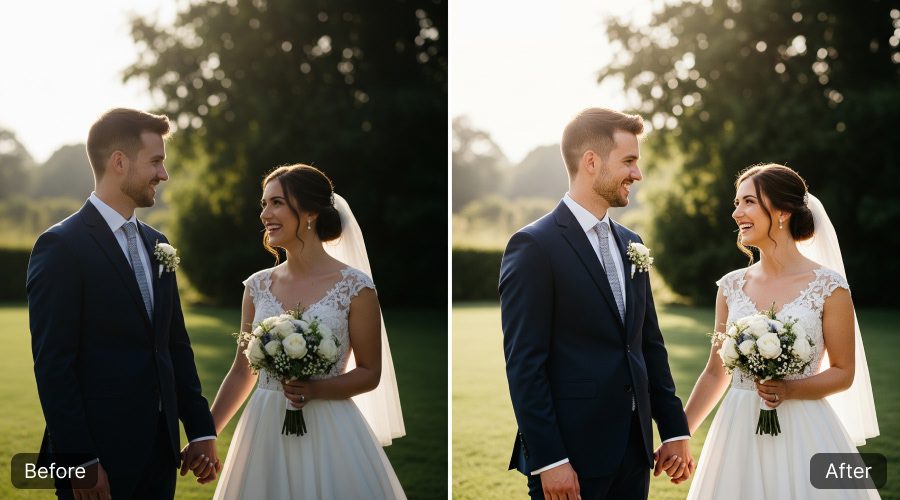
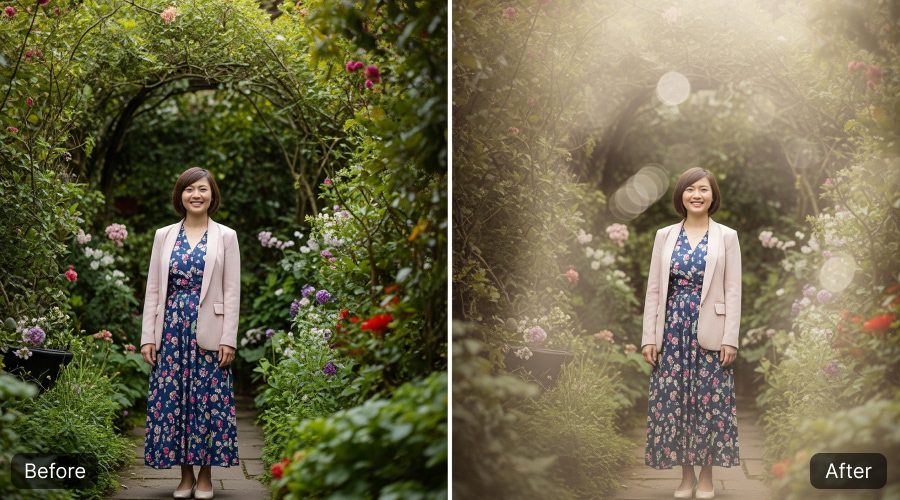
To enhance the light and airy style, add effects through post-production; these effects help create a romantic, ethereal atmosphere and make the photo more soulful.
- Soft Glow / Haze: This effect simulates the feeling of light flooding the frame. In software like Lightroom, you can adjust this effect by slightly reducing the Clarity or Dehaze. Clarity controls the contrast in the mid-tones; reducing it will soften the details. Reducing Dehaze will add a slight haze to the image. In Photoshop, you can duplicate the layer, apply the Gaussian Blur filter, then reduce the Opacity of the layer to a low level (around 5-15%) to create a soft glow around the entire image.
- Light Vignette: In contrast to the traditional dark vignette effect, a light vignette can enhance the light airy feeling. This effect will make the edges and corners of the photo slightly brighter than the center, creating the feeling that light is pouring in from all sides. Use the Post-Crop Vignetting tool in Lightroom and drag the Amount to the right to create this effect.
- Subtle Grain for film-like softness: A little grain can give a vintage feel, simulating the look of film and taking away from the perfect digital sharpness. This contributes to the overall softness. Use the Grain tool in the Effects tab and add a very small amount, but be careful to only add enough grain to be noticeable when zoomed in, not so obvious that it becomes distracting.
Create Depth with Blur and Bokeh
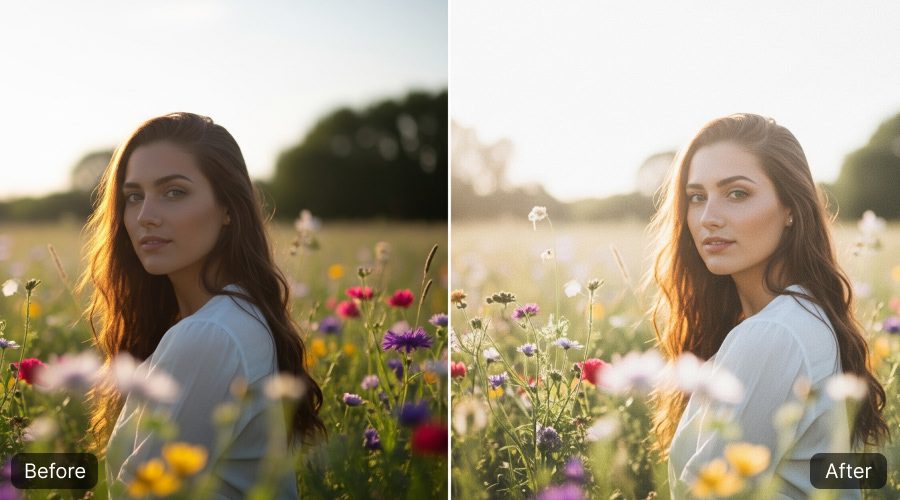
One of the appeals of light and airy photo is the ability to separate the subject from the background gently. This is achieved by creating a shallow depth of field, with a bokeh background. If your original image doesn’t have this effect, you can always recreate or enhance it in post-production.
- Sharpen soft details: Even though the overall image needs to be smooth, the main subject still needs to be sharp to attract attention. Use the Sharpening tool selectively. Most software has a masking feature. Hold down the Alt key (or Option on Mac) while dragging the Masking indicator, and the white areas will be where the sharpening is applied. Adjust so that only the important edges and details of the subject are sharpened.
- Add a soft glow to keep the dreamy feel: Similar to the effect in #4, you can apply a selective glow layer only to the subject. Use the Brush tool with a slight Clarity and Sharpness reduction to brush over skin in portraits or smooth surfaces in product photos. This helps the subject blend in with the overall dreamy atmosphere of the photo without losing focus.
- Create an artificial Bokeh effect: If the background is too obvious and distracting, you can blur it out. In Photoshop, isolate your subject to a separate layer, then apply a Lens Blur or Gaussian Blur filter to the background layer. This will help create depth and draw the viewer’s attention to the point of interest.
Enhance Colors Naturally with HSL & White Balance
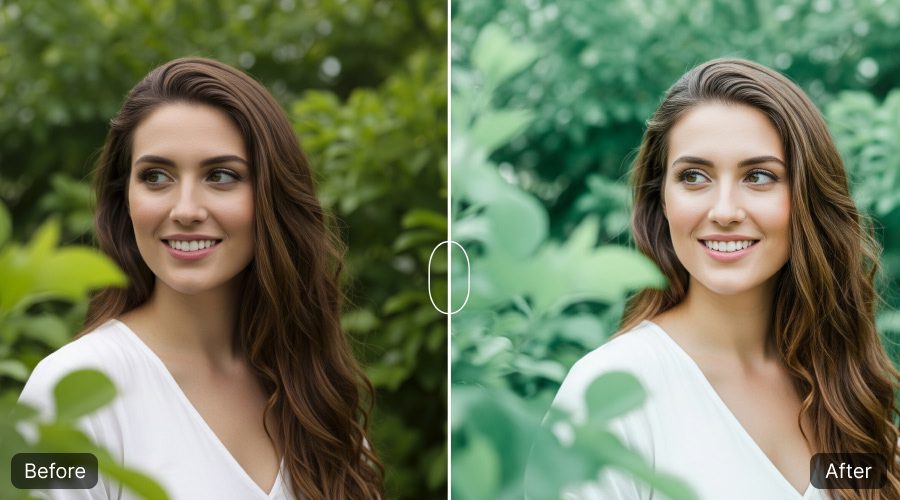
Colors in the light and airy style are often very clean and natural, and tend to lean towards soft pastel tones. The HSL (Hue, Saturation, Luminance) and White Balance tools are essential indicators and tools to achieve colors in this style.
- Add warmth with White Balance: Adjust the Temperature index slightly towards yellow to add warmth. However, be careful not to make skin tones or white areas too yellow, which can be unnatural. Tweak the Tint index further towards pink or green to balance the colors if needed.
- Hue: You can slightly change the hue of specific colors. A popular trend is to shift green towards yellow or teal to create a softer, more artistic-looking vegetation. Similarly, shifting blue towards aqua can make the sky look clearer.
- Saturation: This is an important step. Reduce the Saturation of colors you don’t want to be too prominent, especially greens and yellows in the background. Conversely, you can slightly increase the Saturation of skin tones (Oranges, Yellows) or the main pastel colors. The goal is to create a harmonious color palette, without any color being too bright and distracting.
- Luminance: This tool will help lighten or darken specific colors. Increase the Luminance of skin tones to make them brighter and more radiant. Increasing the Luminance of greens and blues can also contribute to creating a more airy feeling.
Apply Light and Airy Editing Apps
However, there are many effective photo editing software on mobile devices, you can refer to the tools listed below to save the most time editing your photos right on your phone.
- Lightroom Presets: Presets are pre-saved sets of editing parameters that help you apply a certain style to your photos with just one click. There are thousands of light and airy presets created and shared by professional photographers. Using presets is a great way to learn and save time. However, keep in mind that presets can’t always be perfect, as mentioned above – the light and airy style is all about lighting, and every photo has different lighting and color conditions, so after applying a preset, you’ll almost always need to tweak settings like Exposure, White Balance, and Contrast to suit your particular photo.
- VSCO: This app is known for its sophisticated film simulation color filters. Filters in the A (Analog) or C (Chromatic) series are often a good starting point for creating a light and airy look. After applying the filter, you can go to the tools section to further fine-tune the brightness, contrast and color.
- Snapseed: This is an extremely good and free photo editing tool from Google. Use the Tune Image tools to adjust Brightness, Contrast, Ambiance and Highlights. The Glamour Glow tool can also help create a soft glow effect quickly.
=> See more: 9+ Best Photo Editing App for Beginners

Conclusion
Mastering how to edit light and airy photos can elevate your photos, bringing a clear, delicate and emotional beauty. With the 7 tips above, anyone can completely create impressive, light and airy style photos by themselves.
However, for businesses, professional photographers or e-commerce platforms that need to process hundreds or thousands of images every day, doing each step manually can be very time-consuming and difficult to ensure consistency.
With DIGI-TEXX‘s professional photo processing service, this is a solution for editing large quantities of photos, from color balance, brightness correction, to in-depth retouching, ensuring that all your images are perfect, consistent and true to any style you desire. Contact DIGI-TEXX today to receive the best advice and solutions!
=> Read more:


