

Car photo editing is the art of transforming raw images into visual masterpieces. By mastering the right tools, from finding the best photo editing app for quick mobile adjustments to leveraging advanced desktop software and AI image processing platforms, you can effortlessly highlight sleek body lines, eliminate harsh glare, and execute flawless background replacements.
Whether you are optimizing personal shots or building immersive virtual showrooms for dealerships, a standardized workflow is essential. Especially for high-volume commercial needs, professional solutions from DIGI-TEXX are the definitive key to elevating the ultimate visual and user experience.
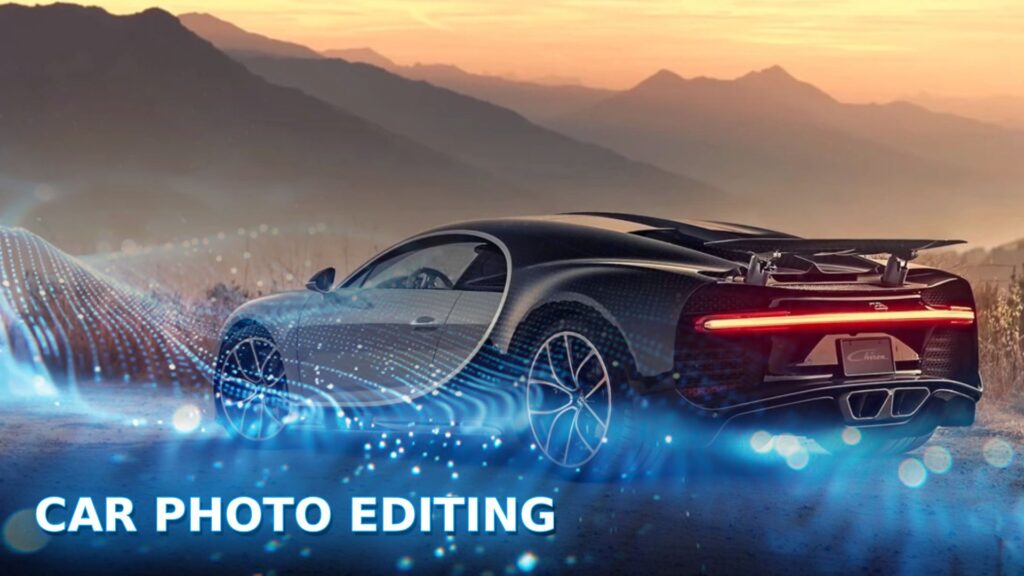
Common Car Photo Editing Techniques
Professional car photo editing involves a range of techniques that enhance image quality, improve visual consistency, and showcase every vehicle at its best. Below are the most commonly used editing techniques for creating high-impact automotive photos.
Background Removal And Replacement
A cluttered background can distract buyers from the vehicle and make listings appear unprofessional. Background removal isolates the car using precise clipping paths or AI-assisted masking, while background replacement creates a clean, consistent setting for every image.
For the most natural result, professional editors preserve fine details like mirrors, antennas, and wheel spokes, then match the new background’s perspective and lighting with the original photo. Contact shadows are also added to prevent the vehicle from appearing to “float.”
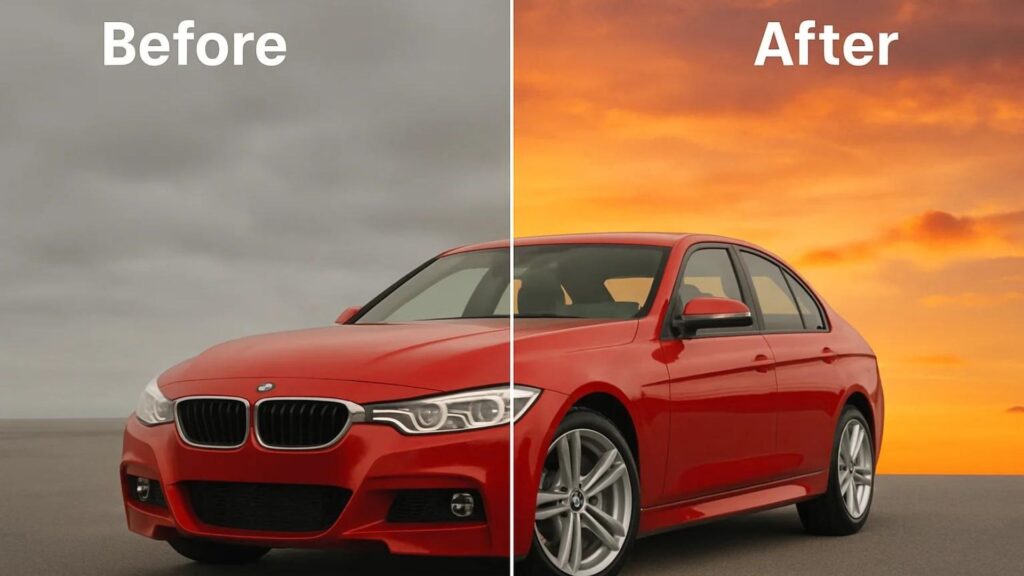
Color Correction
Accurate color is critical in automotive photography because buyers often judge a vehicle’s condition based on its paint finish. Lighting conditions can easily distort the original color, causing white cars to appear blue or metallic paint to lose its depth.
Professional editors first correct white balance and exposure before adjusting highlights, shadows, contrast, and vibrance. Rather than oversaturating the image, the goal is to reproduce the vehicle’s actual paint color and maintain consistency across every photo.

Paint And Reflection Enhancement
Dust, fingerprints, and uneven reflections can make even a well-maintained vehicle appear dull. Paint enhancement restores depth and gloss while preserving the natural texture of the finish.
Instead of increasing sharpness across the entire image, professional retouchers selectively enhance body panels and control reflections to emphasize the vehicle’s contours. The result is a cleaner, more premium appearance without making the paint look artificially polished.
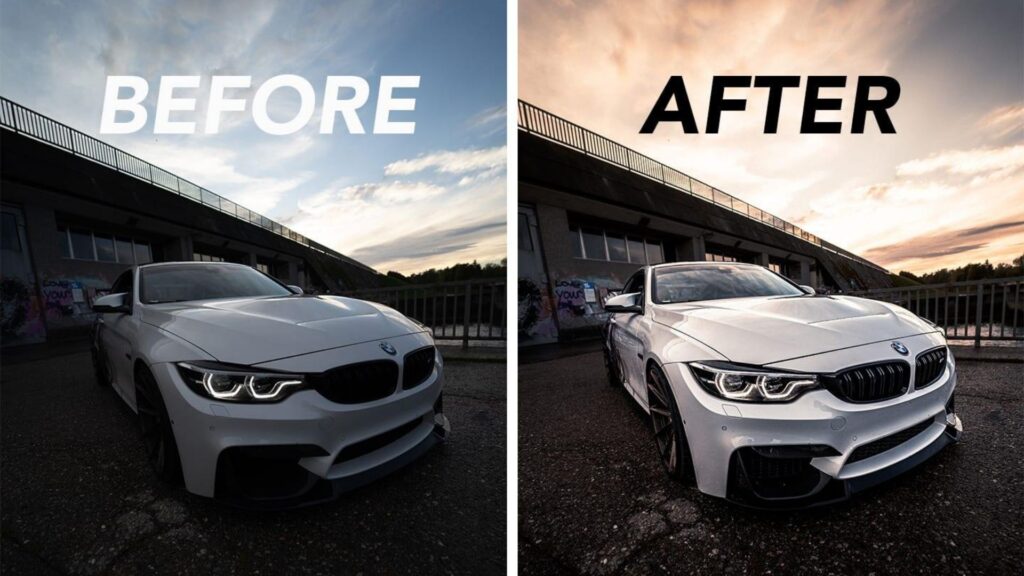
Shadow Creation
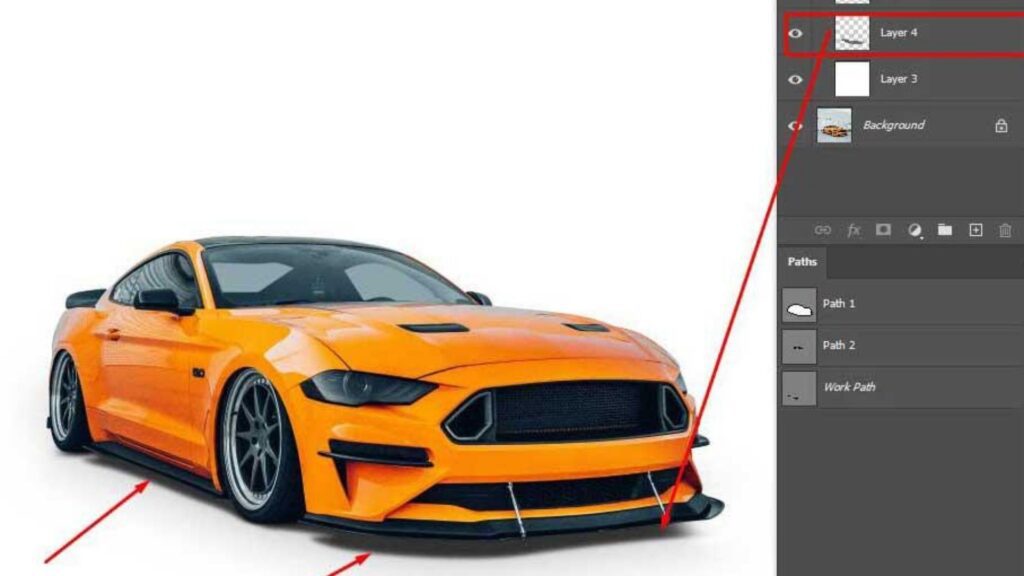
Natural shadows give a vehicle weight and dimension. Without them, edited cars often appear unrealistic, especially after the background has been removed.
Professional editors create soft contact shadows that match the original light direction, intensity, and ground surface. This subtle adjustment helps the vehicle blend naturally into its new environment while creating a more realistic three-dimensional effect.
Window And Glass Retouching
Vehicle windows frequently reflect nearby buildings, trees, or photographers, making the image look cluttered. Glass retouching minimizes these distractions while preserving realistic reflections that indicate the surface is genuine glass.
Editors also remove water spots, dust, and glare to improve visibility without making the windows appear unnaturally transparent.
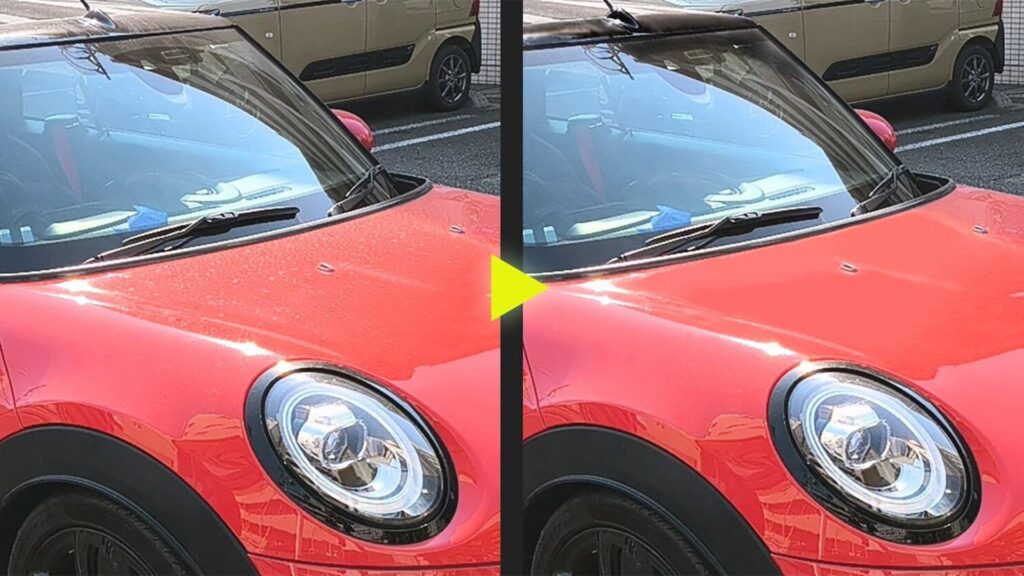
Wheel And Tire Enhancement
Clean wheels and tires reinforce the impression that a vehicle has been properly maintained. Because these components naturally attract attention, even minor imperfections can affect the overall presentation.
Professional enhancement removes brake dust, restores the tire’s natural black finish, and improves wheel clarity while preserving realistic textures. The objective is to highlight existing quality rather than digitally altering the vehicle’s condition.
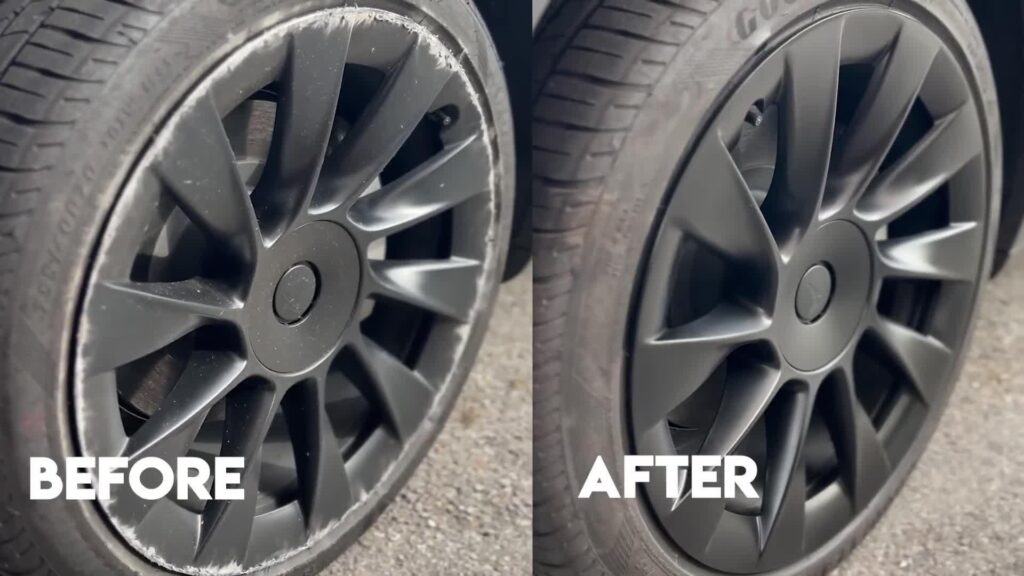
Object Removal
Power lines, road signs, nearby vehicles, or pedestrians can distract buyers from the main subject. Object removal eliminates these unnecessary elements to create a cleaner, more focused composition.
However, professional retouching should never remove scratches, dents, or other vehicle defects that could misrepresent the car’s actual condition. Ethical editing enhances presentation without compromising transparency.
Alt text: Object removal in professional car photo editing
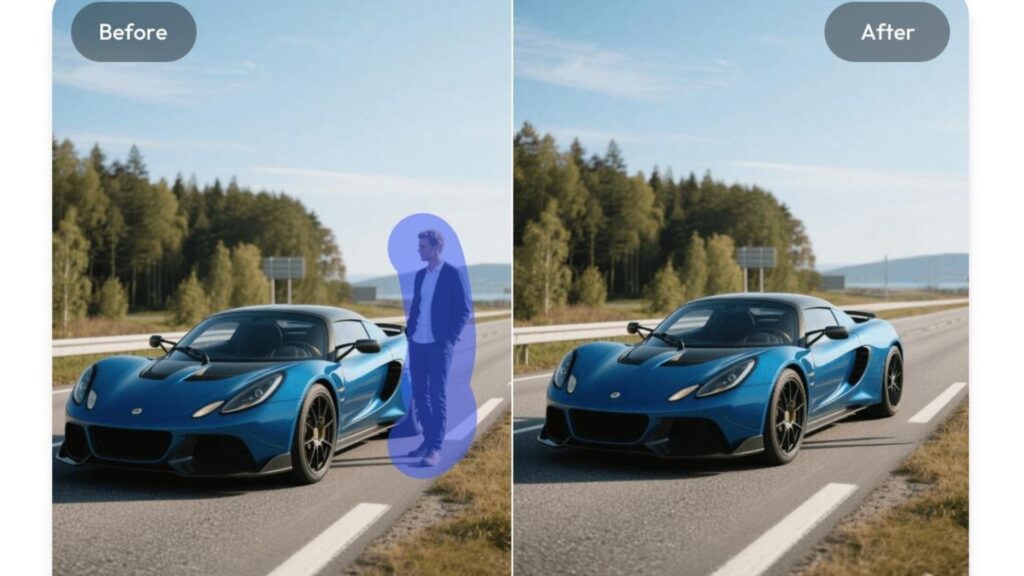
Perspective Correction
Wide-angle lenses often distort a vehicle’s proportions, making the front bumper, wheels, or roofline appear stretched. Perspective correction restores accurate geometry by straightening vertical lines and balancing the vehicle’s proportions.
This adjustment ensures the car looks as it would in real life, giving buyers a more accurate impression of its design.
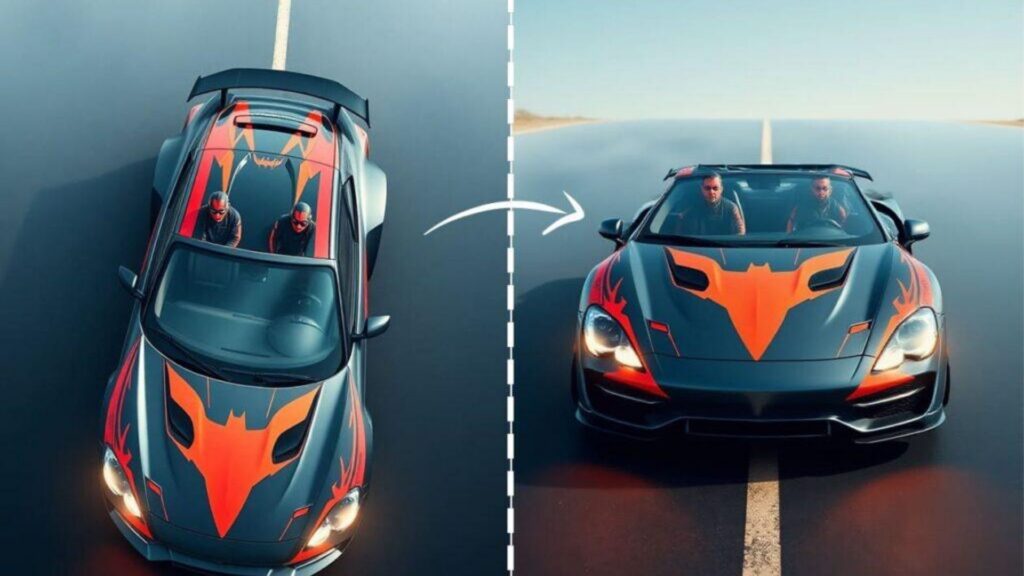
Sky Replacement
A dull or overexposed sky can reduce the visual appeal of an otherwise excellent vehicle photo. Sky replacement refreshes the background while maintaining realistic lighting and reflections on the car’s surface.
For dealership listings, subtle blue skies generally produce the most natural result. Dramatic sunsets or artificial backgrounds may draw attention away from the vehicle and reduce authenticity.
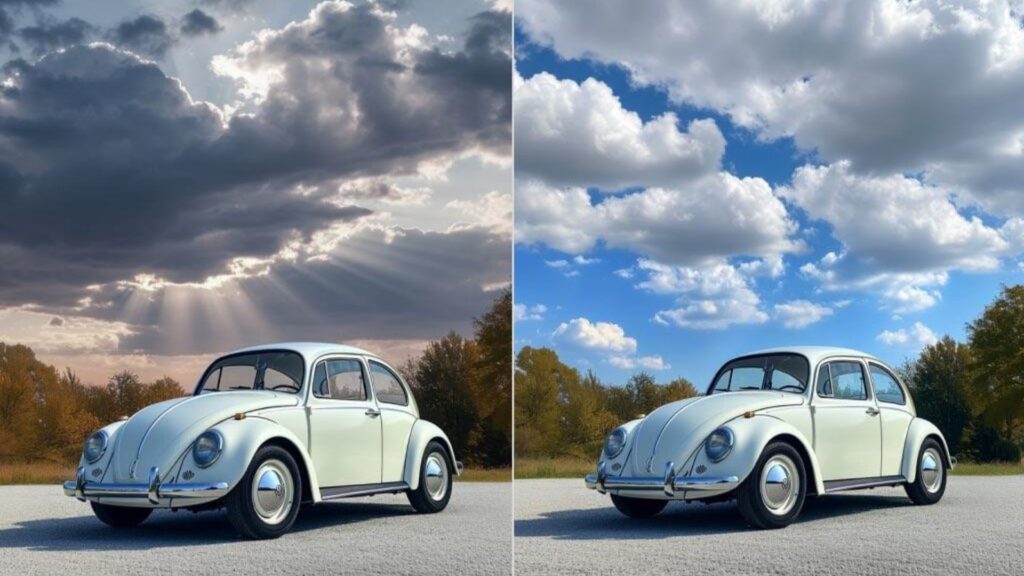
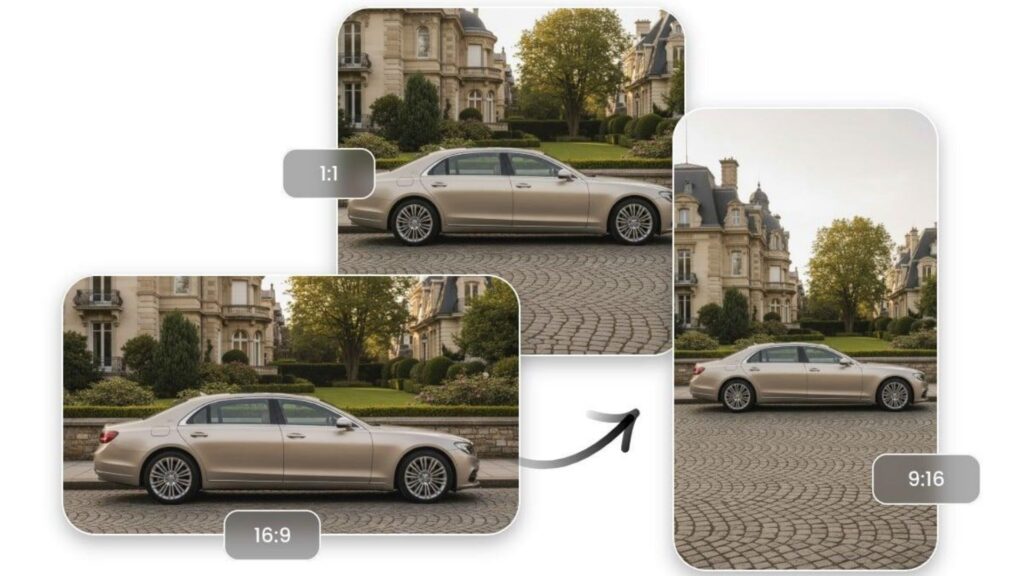
Image Cropping and Resizing
The final editing step ensures every image is optimized for its intended platform. Consistent cropping keeps the vehicle centered, while proper resizing balances image quality with fast loading speeds.
Maintaining the same aspect ratio across all inventory also creates a more professional browsing experience and supports better image presentation on dealership websites, marketplaces, and social media platforms.
Car Photo Editing Process
Editing a great car photo isn’t about applying random filters—it’s about following a logical workflow that enhances the vehicle while preserving its true appearance. Whether you’re editing photos for a dealership, online marketplace, or personal portfolio, these seven steps will help you achieve clean, professional-looking results.
Step 1. Select The Best Photo
Start by choosing the strongest image before making any edits. Look for a photo that is sharp, well-lit, and captures the vehicle from a flattering angle. Avoid images with motion blur, poor focus, or blocked views, as these issues are difficult to fix during post-processing.
Pro Tip: A high-quality source image always delivers better editing results than trying to rescue a poor-quality photo.
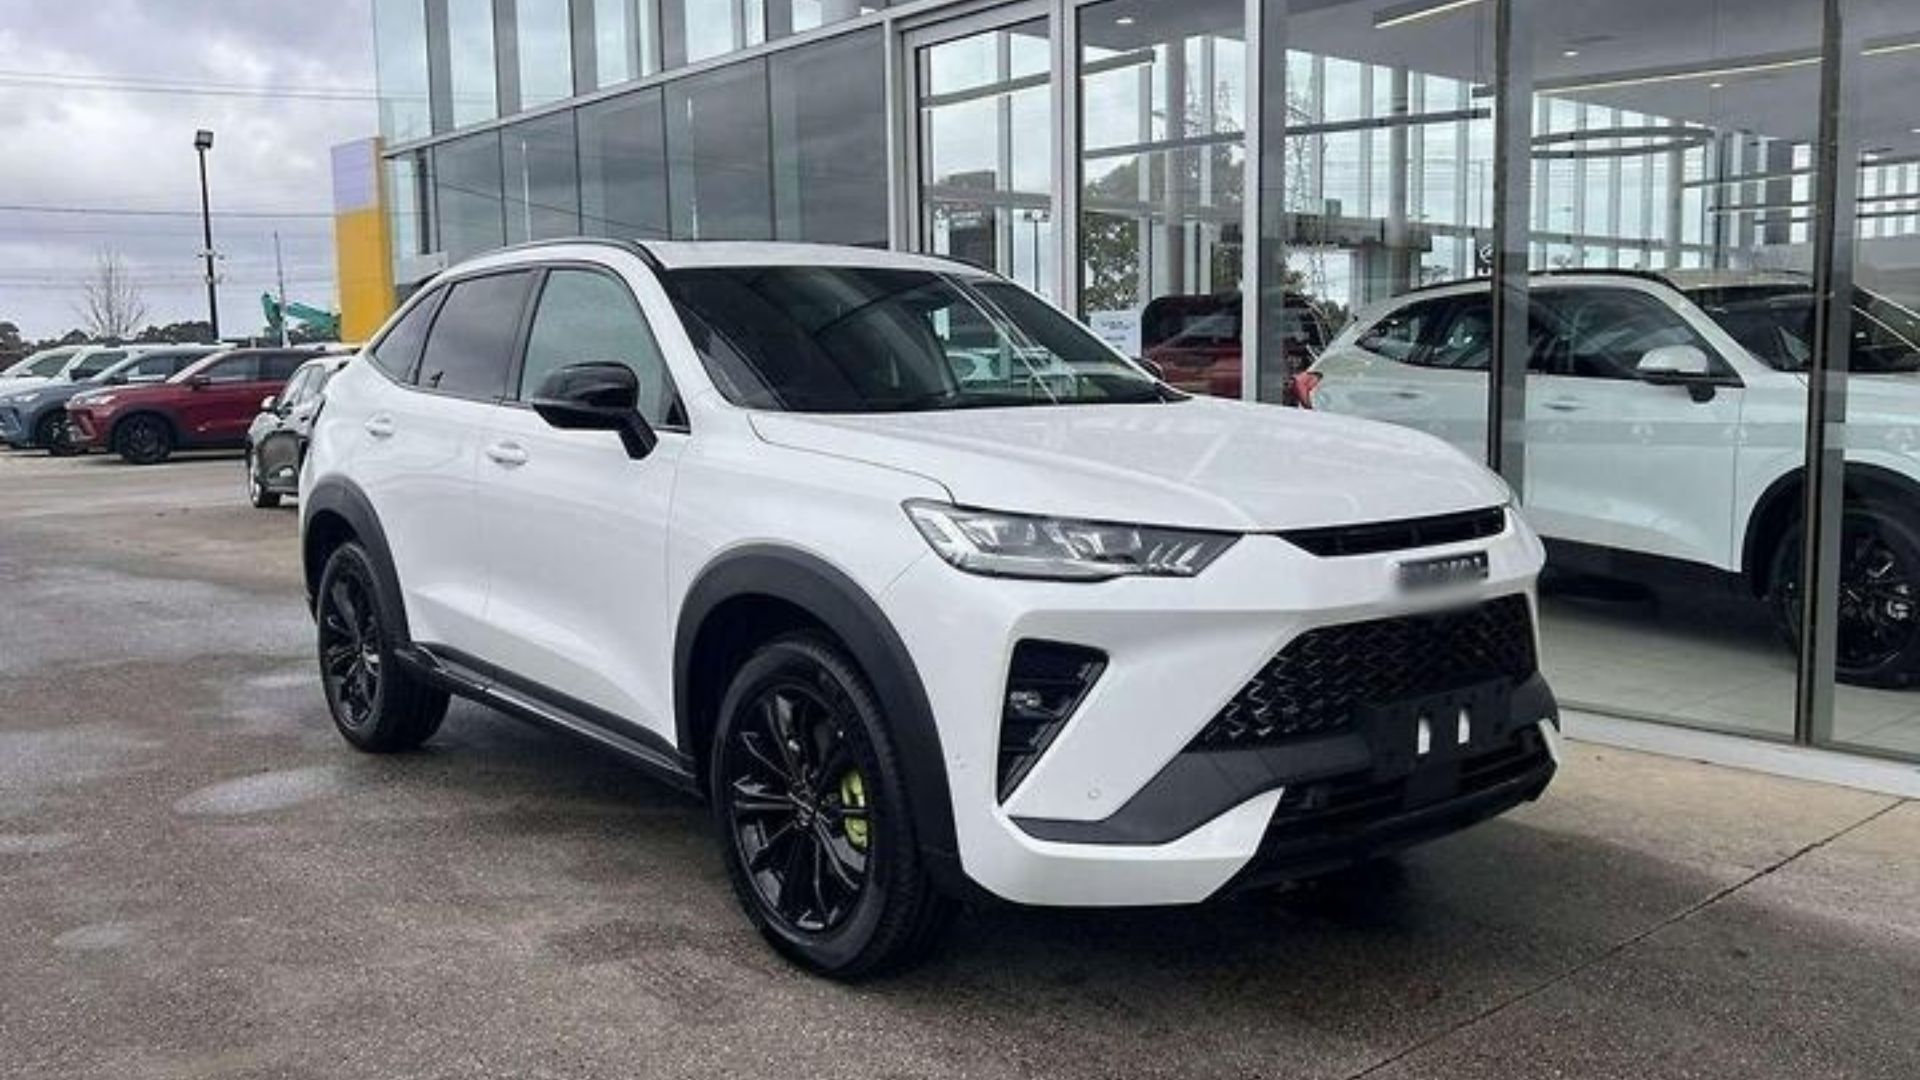
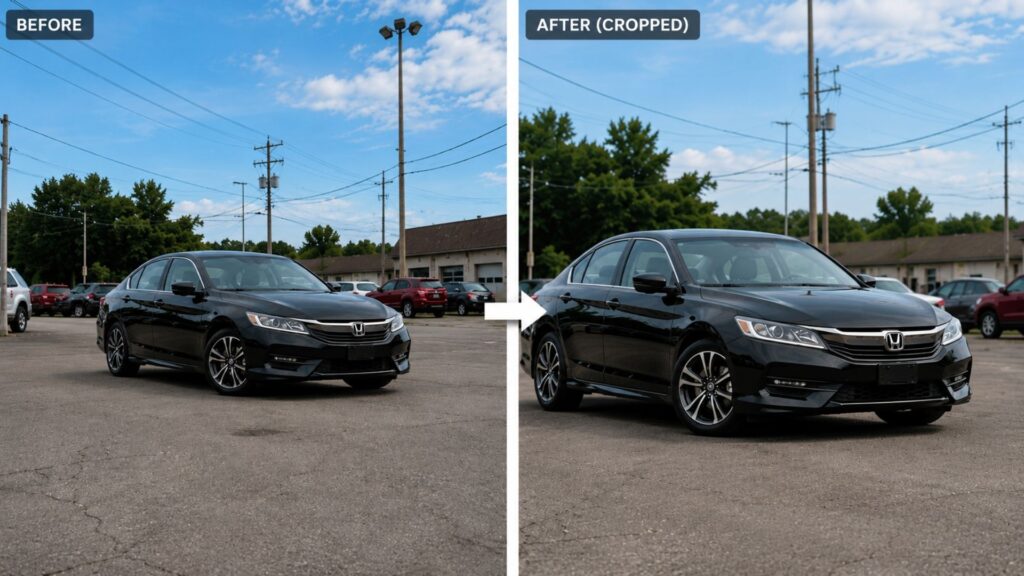
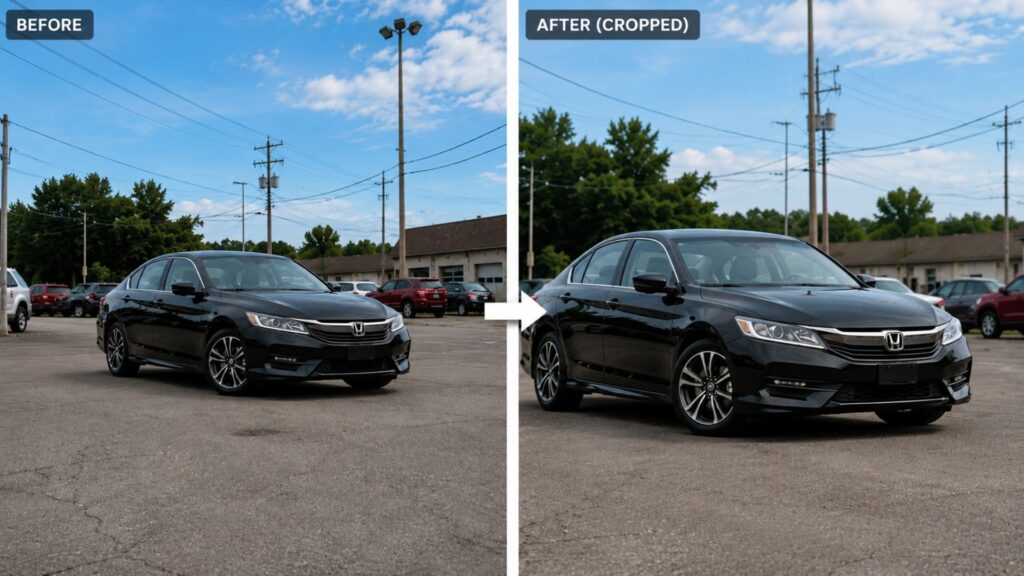
Step 2. Crop And Straighten The Image
Crop the photo to remove unnecessary distractions and improve composition. Straighten the horizon and ensure the vehicle is level within the frame. Leave slightly more space in front of the car than behind it to create a balanced, natural-looking composition.
Common Mistake: Cropping too tightly can cut off mirrors, wheels, or important design details.
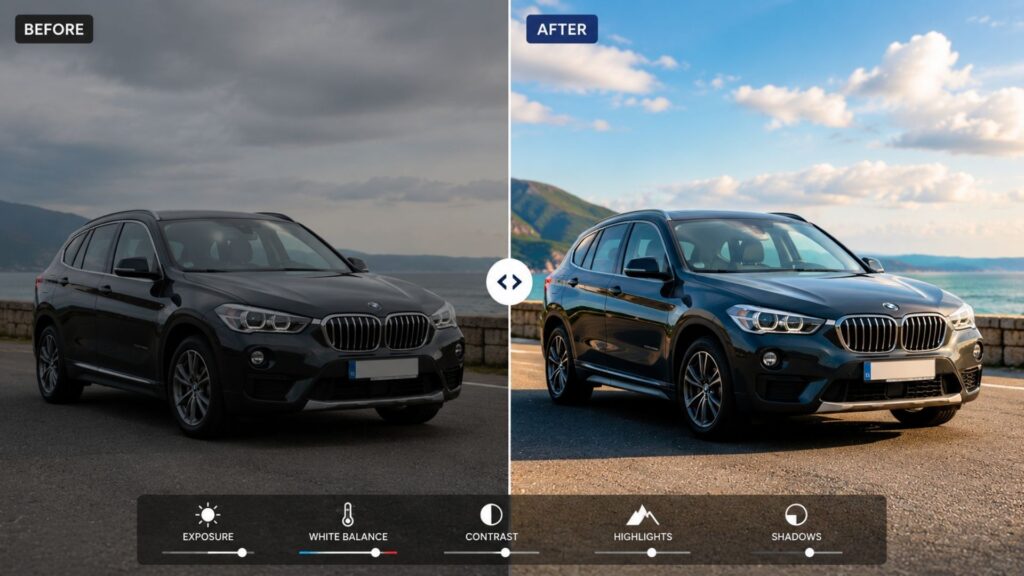
Step 3. Adjust Lighting And Colors
Correct the overall lighting before applying detailed edits. Adjust the exposure, white balance, contrast, highlights, and shadows to restore accurate paint colors and improve visibility. The goal is to make the vehicle look as it does in real life rather than creating an overly dramatic effect.
Pro Tip: Correct white balance first, then fine-tune brightness and contrast for a more natural result.
Step 4. Remove or Replace the Background
A busy background can distract attention from the vehicle. Remove unwanted surroundings or replace them with a clean, consistent background that complements the car. If you replace the background, keep realistic shadows beneath the tires so the vehicle blends naturally into the scene.
Common Mistake: Using an unrealistic background with mismatched lighting or perspective.
Step 5. Retouch Vehicle Details
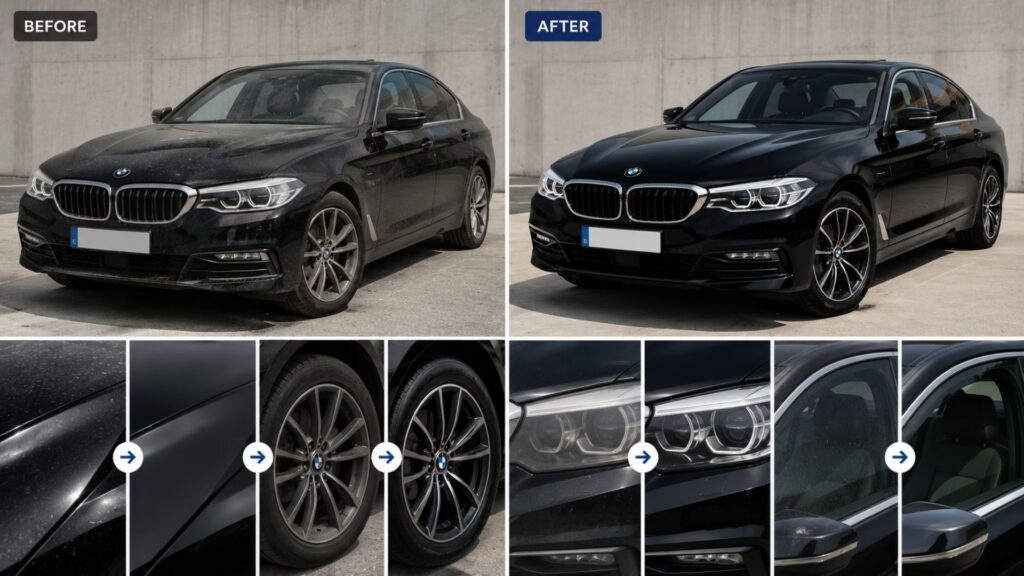
Once the overall composition is complete, refine the vehicle itself. Remove dust, water spots, fingerprints, and minor reflections, then enhance details such as the paint, windows, headlights, wheels, and tires. Keep every adjustment subtle to maintain the vehicle’s authentic appearance.
Pro Tip: Focus on enhancing existing details rather than making the vehicle look artificially perfect.
Step 6. Remove Distracting Objects
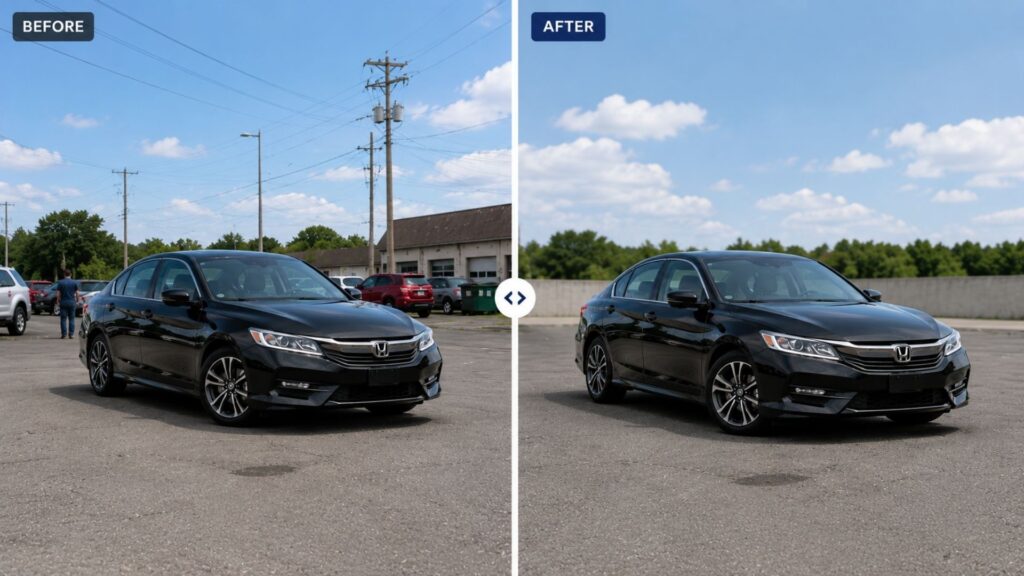
Eliminate unnecessary objects such as people, traffic signs, power lines, trash, or nearby vehicles that draw attention away from the car. However, avoid removing scratches, dents, or other actual vehicle defects if the image is intended for sales listings, as this could misrepresent the vehicle’s condition.
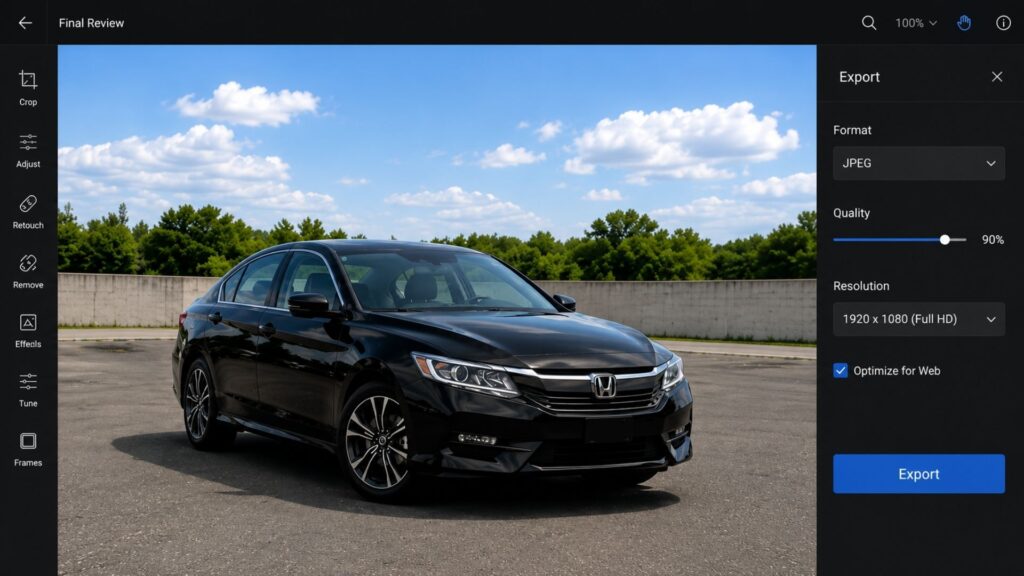
Step 7. Export the Final Image
Before exporting, review the image one final time to ensure colors, alignment, and details look consistent. Save the file in the appropriate format and resolution based on where it will be used, such as a dealership website, online marketplace, social media, or print.
Pro Tip: Compress images for web use to reduce loading times without noticeably affecting image quality.
>>> See more:
- Top 10 Photo Editing Services Online In 2026: Comparison & Review
- Professional Fashion Photo Editing Services for Stunning Visuals
- Best Product Photo Editing Services For eCommerce: Top Providers Compared
Free Car Photo Editing Apps And Software
| Free AI car photo editing tool | Best For | Key Features |
| Canva | Beginners and social media content | Easy-to-use drag-and-drop editor with AI-powered background removal, image enhancement, filters, text overlays, and ready-made templates for creating eye-catching car photos. |
| Adobe Express | Quick online car photo editing | Offers AI background removal, automatic image enhancement, cropping, resizing, and professional design tools for creating polished vehicle photos in minutes. |
| PhotoRoom | Online vehicle listings and eCommerce | Specializes in AI-powered background removal, white background generation, realistic shadows, and batch editing, making it ideal for dealerships and online marketplaces. |
| Pixlr | Intermediate users | Browser-based editor featuring layers, AI object removal, color correction, exposure adjustments, and advanced retouching tools without requiring software installation. |
| Fotor | One-click AI enhancements | Includes AI photo enhancement, HDR effects, background replacement, color adjustments, and portrait retouching to improve the overall appearance of car images. |
| GIMP | Advanced photo editing | Free open-source software with professional-grade features such as layers, masks, selection tools, color grading, and detailed image retouching for complete editing control. |
| Snapseed | Mobile car photo editing | Google’s mobile photo editor with powerful tools including Healing, Tune Image, Selective Adjustments, HDR Scape, Perspective correction, and white balance controls. |
| Lightroom Mobile | Color correction and professional finishing | Designed for photographers who need precise control over exposure, contrast, highlights, shadows, white balance, color grading, and presets to achieve consistent, high-quality car photos. |
>>> See more:
- 13 Street Style Photo Editing Steps In Lightroom For Professional Results
- Top 7 Ecommerce Product Photo Retouching Services Compared
- How To Make A Clipping Path In Illustrator (Step-By-Step)?
AI Car Photo Editor Free
Free AI car photo editors make it easy to enhance vehicle photos without advanced editing skills or expensive software. With just a few clicks, AI can automatically remove backgrounds, improve lighting, adjust colors, sharpen details, and eliminate unwanted objects, significantly reducing the time required for manual editing.
These tools are ideal for individuals, used-car sellers, and small dealerships that need quick edits for online listings or social media. However, because AI relies on automated algorithms, the results may not always be accurate. Complex areas such as mirrors, windows, wheel spokes, reflections, and intricate vehicle edges often require manual refinement to achieve a professional finish.
Some popular free AI car photo editors include:
- Pixelcut – AI-powered background removal and image enhancement.
- Canva AI – One-click background removal and Magic Edit for simple retouching.
- Adobe Express – AI tools for background removal, object removal, and quick enhancements.
- Photoroom – Creates clean product-style vehicle photos for online marketplaces.
- Fotor AI – Automatically adjusts lighting, colors, and sharpness.
While free AI tools are suitable for basic editing tasks, businesses handling large image volumes or requiring consistent, publication-quality results often benefit from professional car photo editing services that combine AI efficiency with expert human retouching.
Why Choose Professional Car Photo Editing Service At DIGI-TEXX?
Transforming raw vehicle images into sales-ready assets requires more than basic adjustments. DIGI-TEXX provides a professional car photo editing service designed to elevate your entire commercial inventory. We focus on enhancing visual storytelling and the overall user experience, ensuring your vehicles connect with buyers instantly.
Key Advantages of Partnering with DIGI-TEXX:
- Instant Sales-Ready Transformation: Our system automatically enhances image resolution, removes cluttered backgrounds, and applies realistic 3D shadows to give every vehicle a polished, professional look in seconds.
- Storytelling Through Backgrounds: Select environments that match your narrative. You can choose from clean virtual showrooms or integrate stunning natural landscapes that promote green living concepts, creating a more inspiring and relatable user experience.
- Effortless Brand Consistency: Simply upload your logo and select its placement. We automatically apply your branding to every car photo, guaranteeing a unified identity across your website, marketplace listings, and advertising materials.
- High-Volume Batch Processing: Process large image catalogs effortlessly. DIGI-TEXX allows you to automate your workflow using a bulk editor or API integrations, applying your customized design to thousands of photos with one click to save significant time and operational costs.
>>> See more:
- Top 10 Free Photo Retouch Tools Online In 2026
- 25 Popular Photo Editing Styles In Photography For Stunning Images
- 15 Best Document Scanning Software: Features, Pricing & Reviews 2026
FAQs About Car Photo Editing
What Is The Best Photo Edit For Cars?
The best edit enhances the vehicle’s body lines, controls harsh reflections, and maintains accurate color balance. It relies on precise subject masking to separate the car from the background, allowing you to boost paint textures while keeping the overall image natural and clean.
How Do I Edit A Photo With My Car?
- Isolate the Vehicle: Use an AI masking tool to select the car body separately so you can adjust its exposure without altering your skin tones.
- Match the Lighting: Ensure the color temperature on your subject matches the environment of the car for a cohesive look.
- Clean the Background: Remove distracting elements or clutter from the surroundings to keep the focus entirely on you and your vehicle.
What Is The Best App For Car Edits?
- For Desktop: Adobe Lightroom is the best for global color grading, while Adobe Photoshop excels at pixel-level manipulation and reflection removal.
- For Mobile: Snapseed offers great selective adjustments, and Pixelcut AI provides fast, automated background replacements directly on your phone.
What Is The Best Auto Photo Editor?
Pixelcut AI is excellent for quick, automated mobile edits and instant background swaps. For commercial dealerships requiring high-volume processing and strict quality control, a professional car photo editing service like DIGI-TEXX is the most reliable choice to ensure consistency across large inventories.
In this article, we’ve explored essential techniques for mastering car photo editing through expert editing. DIGI-TEXX hope this guide has provided you with valuable insights to elevate your skills and transform ordinary car photos into stunning works of art. If you’re eager to learn more about specific editing methods or need assistance with your projects, don’t hesitate to reach out. DIGI-TEXX is here to help you unlock your full potential and develop your unique style!
DIGI-TEXX Contact Information:
🌐 Website: https://digi-texx.com/
📞 Hotline: +84 28 3715 5325
✉️ Email: [email protected]
🏢 Address:
- Headquarters: Anna Building, QTSC, Trung My Tay Ward
- Office 1: German House, 33 Le Duan, Saigon Ward
- Office 2: DIGI-TEXX Building, 477-479 An Duong Vuong, Binh Phu Ward
- Office 3: Innovation Solution Center, ISC Hau Giang, 198 19 Thang 8 street, Vi Tan Ward
Reference:
- Adobe. Lightroom and Photoshop automotive photo editing tutorials. https://www.adobe.com
- Pixelcut. AI background removal and automated image editing solutions. https://www.pixelcut.ai