
To take better photos, choose a clear subject, find suitable light, simplify the background, focus carefully, and use a shutter speed that suits the movement. Review the result, change one thing, and try again. DIGI-TEXX shares 25 practical photography tips to help you improve with a camera or smartphone.
In this guide, DIGI-TEXX shares practical photography tips for beginners covering everything from essential camera settings and photography tips composition to lighting, framing, and photo editing. The guide also includes practical techniques that apply to both dedicated cameras and smartphones, making it easier to improve your photography skills regardless of the device you use.

>>> See more:
- 7+ Best Photo Editing Apps for Android & iPhone (2026 Review)
- 10 Free Photo Retouch Tools For Online Editing 2026
- 25 Popular Photo Editing Styles In Photography For Stunning Images
1. Master The Camera You Already Own
One of the most useful photography tips for beginners is surprisingly simple: learn your current camera before spending money on a new one.
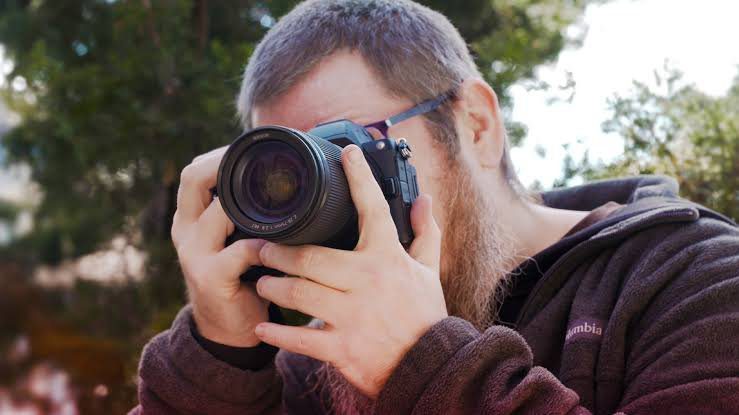
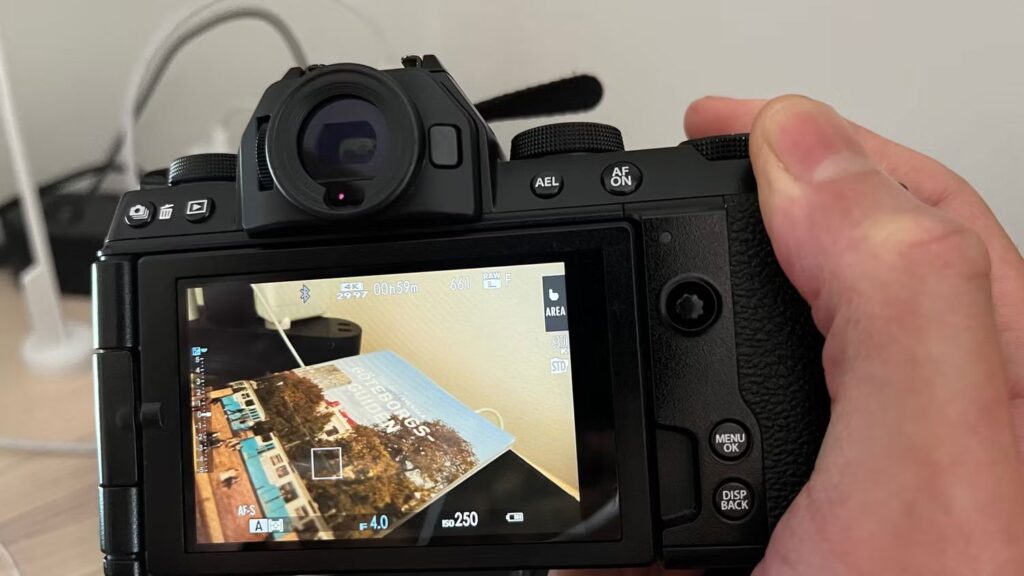
Take time to understand where to change aperture, shutter speed, ISO, autofocus mode, white balance, exposure compensation, and drive mode. You should be able to make common adjustments without stopping to search through the menu.
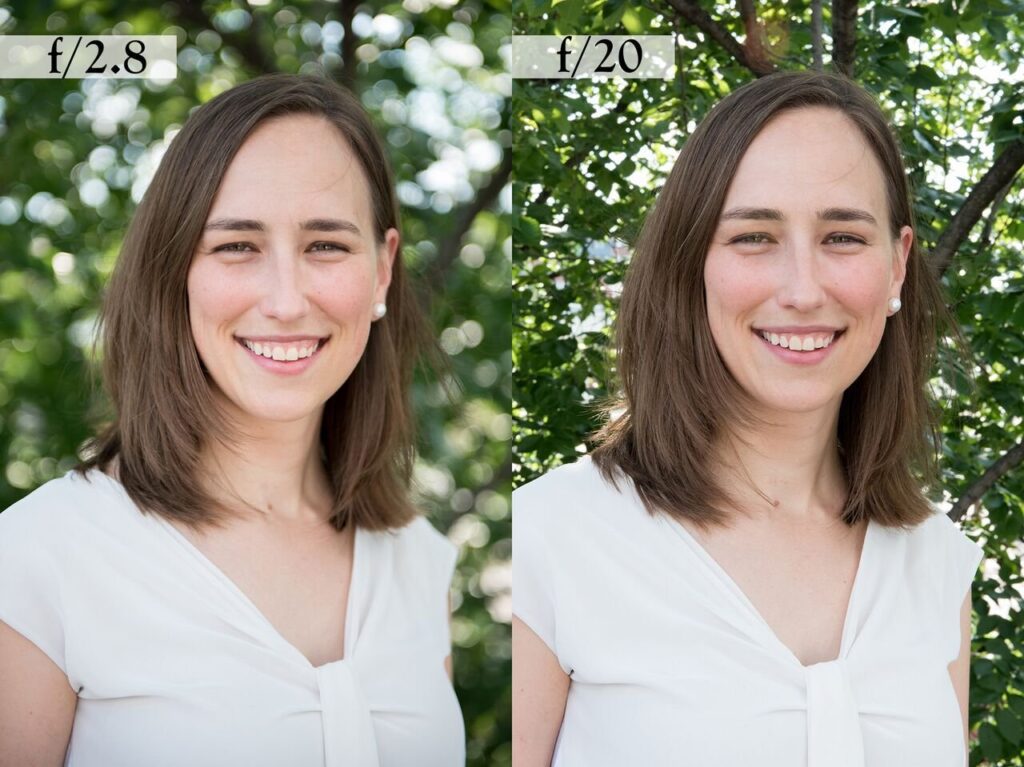
Try a simple exercise: photograph the same subject at f/2.8, f/5.6, and f/11, then compare the background and overall sharpness. Repeat at 1/30, 1/125, and 1/500 second to see how shutter speed changes motion and camera shake.
Use settings your lens and camera support; not every lens opens to f/2.8, and many phones have a fixed aperture. Keep the subject and lighting similar when comparing results so the effect is easier to see.
The purpose is not to memorize every function. It is to develop enough familiarity that camera settings become tools for making creative decisions rather than technical obstacles.
2. Learn The Camera Settings That Matter Most
- Start with aperture, shutter speed, and ISO—the three settings commonly grouped as the exposure triangle. Aperture and shutter time affect the light captured; ISO influences how the captured signal is rendered. Learn the effect of each setting on your intended image rather than treating exposure as brightness alone. [1]
- Shutter speed: Faster speeds such as 1/500 sec or 1/1000 sec are useful for freezing movement, while slower speeds can intentionally create motion blur.
- ISO: ISO 100–200 is a useful starting range in bright conditions, while higher ISO values can help in low light at the cost of more visible noise.
For example, if you photograph a cyclist moving quickly, increasing shutter speed may freeze the action but also reduce the amount of light reaching the sensor. You may then need to open the aperture or increase ISO to compensate.
This is one of the most important photography tips and tricks to understand: do not choose settings based only on brightness. Choose them according to the visual result you want.
These settings are starting examples, not universal recipes. A moving child, a distant bird, and a still portrait may require different shutter speeds. Check subject movement and depth of field in the image before increasing or decreasing ISO. [1]
>>> See more:
- AI Image Processing Tools: Top 10 Best Ranked In 2026
- AI Photo Retouching: Top 10 Best Free Online Tools In 2026
- Top 5 E-commerce Photo Editing Services To Improve Product Images
3. Start With Simple, Balanced Composition
Good composition begins with answering one question: What is the photograph actually about?
Once the subject is clear, remove elements that compete with it. The rule of thirds can help beginners position subjects away from the center, while leading lines can direct attention through the frame. Symmetry, negative space, framing, and foreground layers can also add structure. However, composition rules are guidelines rather than mathematical formulas. A centered portrait can be stronger than a rule-of-thirds composition if symmetry or visual impact is the goal. One practical photography tip is to switch on your camera’s gridlines. They make it easier to check horizons, alignment, and subject placement while you are learning.
The University of Arkansas also presents composition and lighting as practical choices for clearer photographs. Treat the rule of thirds as one option: compare a centered frame with an off-center version, then choose the one that directs attention more effectively. [2]

4. Choose A Clear Subject For Every Photo
A photograph becomes more effective when the viewer immediately understands where to look. Before pressing the shutter, identify the primary subject and then examine everything surrounding it. A bright sign, colorful object, or person in the background may attract attention even when it has nothing to do with the story.
Try photographing the same scene twice: once as you normally would, and once after removing every unnecessary element. Compare the two images at thumbnail size. If the second photograph communicates the subject faster, your composition has improved. For photography tips for beginners, this is an important distinction: taking a technically sharp photograph is not the same as creating a visually clear photograph.

>>> See more:
- 13 Street Style Photo Editing Steps In Lightroom For Professional Results
- Top 7 Ecommerce Product Photo Retouching Services For Online Stores
- How To Make A Clipping Path In Illustrator (Step-By-Step)?
5. Change Your Shooting Position And Angle
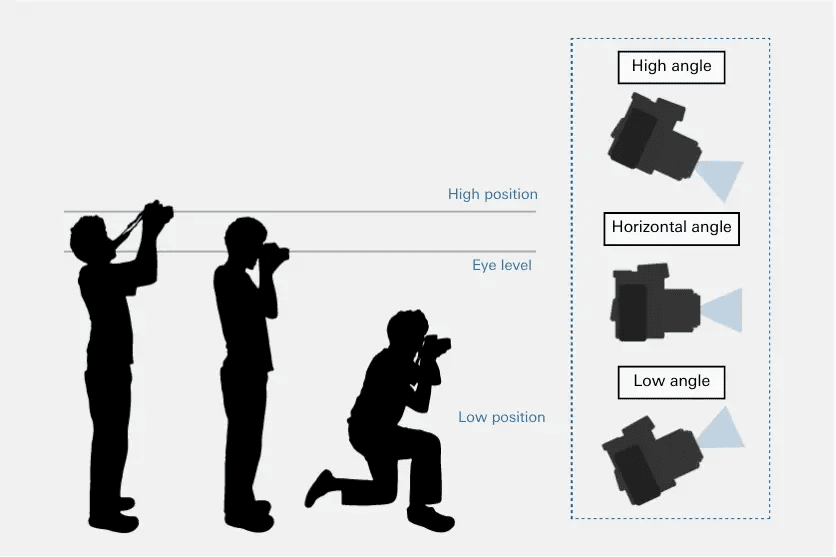
Changing your position can transform a photograph without changing the camera.
Take the same subject from:
- eye level;
- a low angle;
- a higher viewpoint;
- close range;
- farther away with a longer focal length.
Each position changes the relationship between the subject, foreground, and background. For example, lowering the camera when photographing architecture can exaggerate height. For wildlife, getting closer to the animal’s eye level can create a more intimate perspective and often places the background farther out of focus. One of the most practical photography tips is therefore to move before changing lenses. Walk a few steps left or right and see how the background changes before reaching for another piece of equipment.
6. Check The Background Before You Shoot
A strong subject cannot always rescue a distracting background. Look for poles appearing behind heads, bright patches, tangled cables, unrelated people, signs, or colors that compete with the subject. These distractions are particularly noticeable in portraits.
You can often fix the problem without editing. Move the camera slightly, change the subject’s position, lower your shooting angle, or increase the distance between the subject and background.
For smartphone users searching for photography tips with a phone, this matters just as much. Portrait mode can blur a background, but it cannot reliably fix a distracting object that is poorly positioned within the frame.

7. Watch The Edges Of Your Frame
Beginners often concentrate on the main subject and forget to check what is happening around it. However, distracting details near the edge of the frame can easily weaken an otherwise well-composed photo.
Before taking the picture, take a moment to inspect the entire frame. Look for cropped hands or feet, the top of a building, stray branches, poles, or objects that appear to grow out of your subject’s head. Small bright areas near the border also deserve attention because they can pull the viewer’s eye away from the main subject.
This is especially important when photographing people. For example, if a person is standing near the edge of the frame, make sure there is enough space around them and that important body parts are not awkwardly cut off. When photographing architecture or landscapes, check the corners for unwanted objects that may not have been noticeable when you were focusing on the main subject.
Developing this quick frame-checking habit is one of the simplest photography tips for improving composition. It takes only a few seconds and can save you from having to crop out distracting elements during editing later.

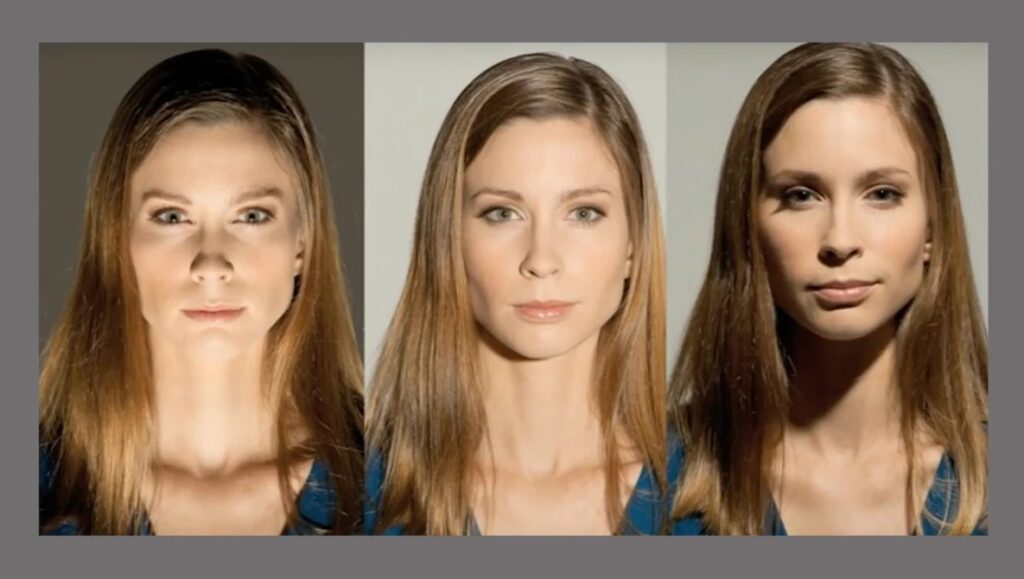
8. Learn How Light Changes Your Photos
Exposure is only one part of lighting. Learn to evaluate direction, intensity, softness, color, and contrast.
Imagine photographing a person’s face beside a large window:
- Light from the front produces relatively even illumination.
- Side light emphasizes facial shape and texture.
- Backlight can create a bright rim around the subject.
- Diffused window light produces softer shadows than direct sunlight.
The size of the light source also matters. A large source close to the subject generally produces softer transitions between light and shadow than a small, distant source. If a photograph looks flat, harsh, or unflattering, changing the light position may produce a bigger improvement than changing your camera settings.
>>> See more:
- Best Fashion Photo Editing Services 2026: Professional Editing
- Best AI-Powered Photo Editing Software In 2026: 13 Top AI Photo Editors Compared
- Top 10 Photo Editing Services Online In 2026: Comparison & Review
9. Look For The Best Natural Light
Good natural light is one of the easiest ways to improve an image without buying equipment. The period around sunrise and sunset is often called the golden hour, when the sun is lower and the light tends to be warmer and more directional. Nikon photographers also emphasize timing and the warm quality of golden-hour light in landscape work.
But do not assume that midday light is always bad. Overcast conditions can provide soft, diffused illumination, while open shade can be excellent for portraits. A better rule is to match the light to the subject. Soft light is often flattering for people; directional light can be more useful when texture and shape are important.
This is one of the photography tips worth practicing repeatedly: photograph the same subject in morning, midday, and late-afternoon light and compare the shadows, colors, and contrast.
Nikon’s natural-light guidance shows that useful photographs can be made outside golden hour too. For practice, keep the subject constant and compare the direction and hardness of shadows at different times. [3]

10. Avoid Losing Detail In Bright Areas
One of the most difficult exposure mistakes to repair is highlight clipping. Once an area has been recorded as completely white, the original texture may no longer be recoverable. Watch particularly carefully when photographing clouds, white clothing, reflective surfaces, windows, or bright skies.
Your camera’s histogram can help. The left side represents darker tones, while the right side represents brighter tones. If important information is pushed against and clipped at the right edge, the image may be losing highlight detail. If this happens, try reducing exposure compensation, lowering ISO, narrowing the aperture, or using a faster shutter speed. The correct adjustment depends on which creative variable you want to preserve.
For professional photography tips, this is an important habit: do not judge exposure only from the LCD screen. Use the histogram when the lighting is challenging.
A bright edge on the histogram does not automatically mean the photograph is wrong: reflections and light sources may legitimately be very bright. Protect detail that matters to the subject. A camera preview histogram may also differ from the latitude available in a RAW file, so check the file before claiming complete recovery.

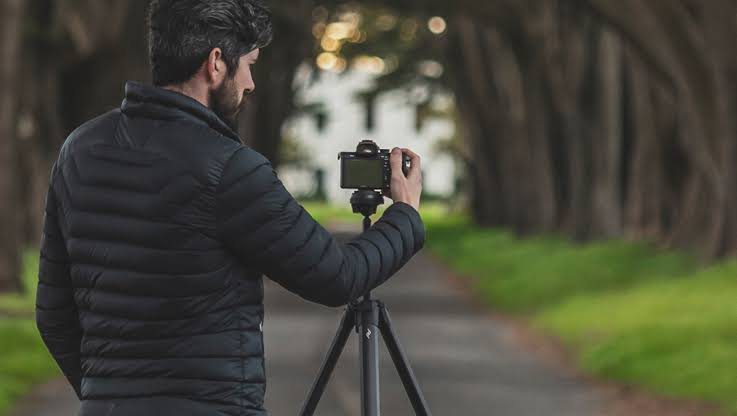
11. Know When To Use A Tripod
A tripod is most useful when camera movement is the limiting factor.
Consider one for:
- night photography;
- long exposures;
- landscapes;
- architecture;
- macro photography;
- product photography;
- panoramas;
- exposure bracketing.
Suppose the scene requires a 1/4-second shutter speed. Handholding may introduce camera shake, particularly with longer focal lengths. A tripod lets the camera remain stable while the shutter stays open.
But remember that a tripod does not freeze the subject. If a person is moving, you still need an appropriate shutter speed. For smartphone users, the same principle applies. A compact tripod can be particularly useful for night scenes, self-portraits, and long-exposure modes.
12. Use Flash When Natural Light Isn’t Enough
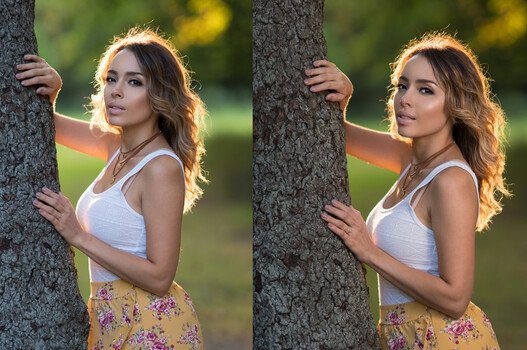
Flash is not simply a solution for dark rooms. It can also be used outdoors to control contrast. For example, a person standing under strong sunlight may have deep shadows under the eyes and nose. A small amount of fill flash can brighten those areas without dramatically changing the overall appearance of the scene.
When using an external flash indoors, bouncing it from a neutral ceiling or wall can produce a larger, softer light source than pointing the flash directly at the subject. One of the more advanced photography tips is to think of flash as a lighting tool rather than a brightness button. Ask what part of the scene needs to be shaped or balanced before turning it on.
>>> See more:
- Photo Editing and Retouching: Benefits, Techniques, and Best Services
- E-commerce Photo Editing Services: Top Companies & Solutions For Online Stores
- Photo Editing Services For Wedding Photographers: 6 Best Services To Consider
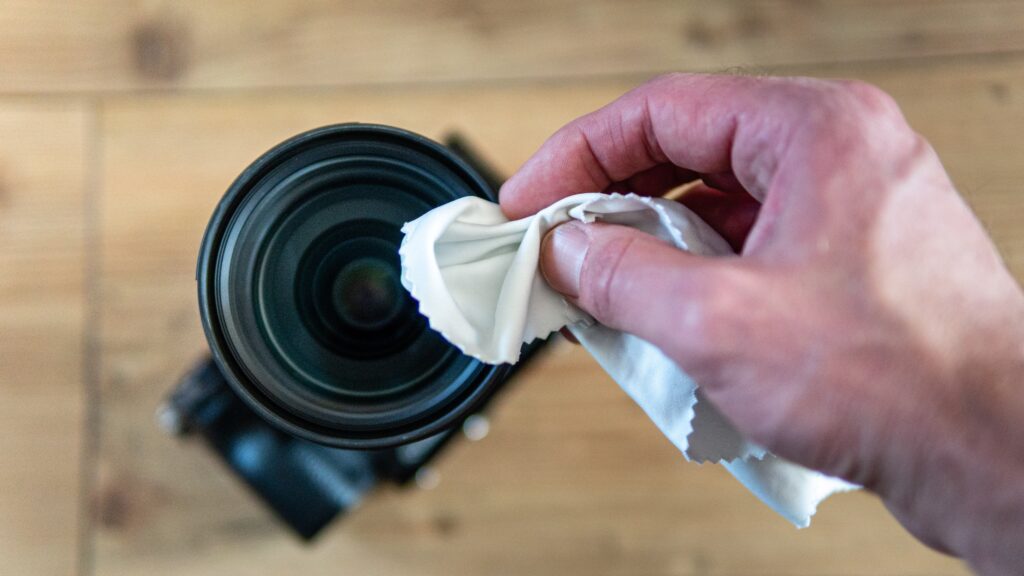
13. Keep Your Camera Lens Clean
A fingerprint on the front element can create haze, reduce contrast, and produce unwanted flare when shooting toward bright light. However, avoid aggressively cleaning the lens every time you see a speck of dust. Loose particles can usually be removed with a blower, while fingerprints and oily marks require more careful cleaning with appropriate lens-cleaning materials.
Keep a microfiber cloth in your camera bag and check the lens before important shoots. For photography tips for beginners with phones, the same principle applies to smartphone cameras. The lens is constantly exposed to fingerprints because phones are handled throughout the day. Cleaning it before taking photos can make a surprisingly noticeable difference.
14. Take Your Time Before Pressing The Shutter
One of the most useful photography tips for beginners is surprisingly simple: slow down before pressing the shutter. Many weak photographs are not caused by poor equipment but by taking the shot before checking what is happening in the frame.
Before capturing an image, spend a few seconds checking the focus, exposure, subject, background, and composition. Make sure the main subject is sharp, the exposure preserves important details, and nothing distracting is competing for attention. For landscapes, check the horizon and bright areas. For portraits, make sure the eyes are in focus and look for distracting objects behind the subject. When photographing movement, confirm that the shutter speed is fast enough to freeze the action.
You do not need to follow this routine for every single photograph. In fast-moving situations, reacting quickly matters more than carefully reviewing every detail. But when you have time to compose the shot, a brief pause can help you catch problems before they become permanent.
This is one of the easiest photography tips and tricks to practice because it requires no extra equipment. Taking just a few seconds to assess the scene can result in sharper, cleaner, and more intentional photographs.

15. Move Closer Instead Of Relying On Zoom
When your subject looks too small, moving closer can often produce a stronger photograph than immediately zooming.
Physical distance changes perspective, while changing focal length changes framing. This distinction matters. Moving closer with a wide lens can exaggerate foreground features, while stepping back and using a longer focal length can compress the apparent distance between foreground and background.
For smartphone users, avoid excessive digital zoom whenever possible. If your phone has several physical camera lenses, switching to the appropriate focal length is generally preferable to repeatedly enlarging a digital crop. That makes this one of the most useful photography tips with phones as well as with dedicated cameras.
Move only when it is safe and appropriate. Use a longer focal length for wildlife, traffic, or other subjects you should not approach. Perspective changes with camera position, so compare both framing and the relationship between foreground and background.

16. Make The Most Of The Scene Around You
Waiting for a perfect scene can prevent you from making photographs at all. Instead, look for visual elements that are already present: reflections, shadows, textures, repeating patterns, colors, architecture, fog, or weather.
For example, an ordinary street after rain may provide reflections that were not available an hour earlier. A plain wall can become a clean portrait background. Harsh sunlight can create graphic shadows that work for street photography. The professional mindset is not always to search for a better location. It is to ask what the existing light and environment can give you.

17. Experiment With Different Photography Techniques
Experimentation becomes much more useful when you change one variable at a time.
Try these exercises:
- Photograph moving water at 1/15, 1/2, and 2 seconds.
- Shoot the same portrait at f/2.8, f/5.6, and f/8.
- Photograph the subject from front, side, and backlight.
- Try both horizontal and vertical framing.
- Shoot one subject from three different heights.
Then compare the images rather than simply keeping your favorite. These photography tips and tricks turn experimentation into a controlled learning exercise. You can see exactly how each technical decision changes the final photograph.
18. Shoot More And Try Different Approaches
One of the most effective photography tips for beginners is to practice with a specific goal instead of simply taking as many photos as possible. Shooting more only becomes useful when each frame gives you a chance to learn something new.
Choose one subject and photograph it 10 different ways. Move closer or farther away, change your shooting angle, try different compositions, adjust the lighting, or experiment with camera settings. For example, when photographing a cup on a table, compare a close-up shot with a wider composition, then try photographing it from eye level, above, and from a lower angle.
Afterward, review the results and select the two or three strongest images. Look closely at why they work. Is the subject clearer? Does the lighting create more depth? Is the background less distracting? Did a different shutter speed or aperture produce a better result?
These photography tips and tricks are most effective when practice follows a simple learning cycle: take a photo, review the result, identify what could be improved, change one thing, and try again. This makes each shooting session more purposeful.
The goal is not to fill a memory card with hundreds of nearly identical images. It is to build practical experience that improves the decisions made behind the camera.

19. Learn The Basics Of Photo Editing
Good editing begins with correcting the problems that matter most rather than applying dramatic filters.
Start with five adjustments:
- Exposure – controls overall brightness.
- Highlights – manages bright areas.
- Shadows – controls darker regions.
- White balance – corrects unwanted color casts.
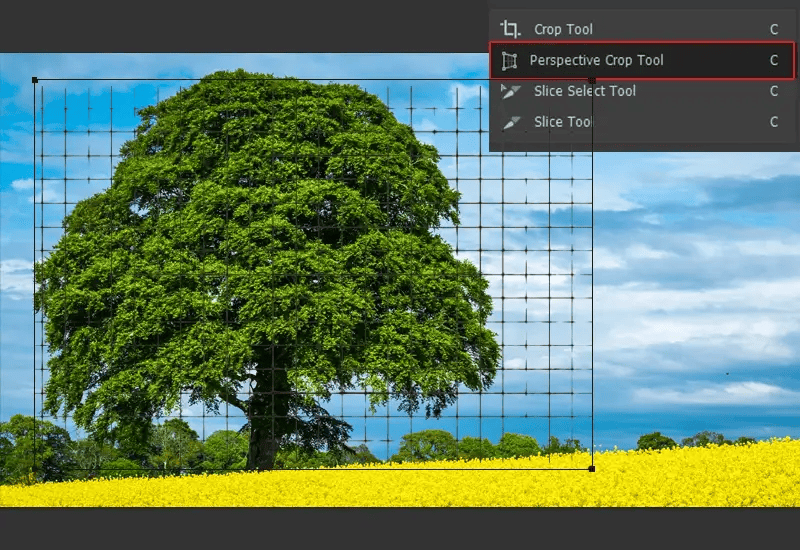
- Crop – strengthens composition.
If you shoot RAW, you have greater flexibility for adjusting exposure and recovering tonal information during editing. Adobe specifically recommends RAW when photographers want greater post-processing flexibility.
For professional photography tips, remember that editing should support the original photograph rather than disguise a weak one. If the composition is fundamentally poor, increasing saturation or applying a preset will not solve the underlying problem.
RAW files retain more tonal and color information for adjustment than an already processed JPEG, but they cannot guarantee recovery of severely clipped highlights or missed focus. Keep the original and export a separate edited version. [5]
20. Be Selective About The Photos You Keep
Professional photographers do not simply show everything they shoot.
After a session, separate images into three groups:
- Strong: technically sound and visually compelling.
- Potential: good idea but needs cropping or editing.
- Reject: missed focus, accidental movement, poor timing, or distracting composition.
When two images are almost identical, keep the stronger one. Compare focus accuracy, subject expression, background, timing, and composition. This selection process is itself one of the most valuable photography tips because it trains visual judgment. Eventually, you will start recognizing the stronger frame while you are still shooting.

>>> See more:
- Clipping Path Explained: Process, Applications, and Future Trends
- Car Photo Editing: Complete Guide To Professional Vehicle Photos
- Top Furniture Photo Editing Tools to Boost Sales
21. Keep Your Photo Library Organized
Good organization becomes increasingly important as your photo collection grows from hundreds to thousands of images. Without a consistent system, finding a specific RAW file or final edit can take longer than the actual editing process.
A practical folder structure can be as simple as 2026 > September > New York Trip > RAW, Selects, and Exports. You can also add keywords or metadata for locations, people, subjects, events, or client projects, making it easier to search for specific images later.
Some of the most practical photography tips focus not on taking better pictures but on building a smoother workflow. There is no need for a complicated cataloging system if it becomes difficult to maintain. A simple structure that is applied consistently to every shoot will be much more useful in the long run.
Good organization also makes photo editing more efficient. When RAW files, selected images, and final exports are clearly separated, you can quickly find the version you need without sorting through hundreds of unrelated photos.

22. Back Up Your Photos Regularly
Keep your photographs in more than one location. The Library of Congress recommends multiple copies on separate storage media, stored in different places, and periodic checks that the files remain readable. A backup is useful only if you can recover the images when you need them. [6]
For example:
- Copy 1: computer or working SSD.
- Copy 2: external hard drive.
- Copy 3: cloud storage or an off-site drive.
This protects against more than hardware failure. Theft, accidental deletion, water damage, fire, and corrupted storage can all destroy photographs. If your photographs are important enough to spend hours shooting and editing, they are important enough to back up.
Test restoration periodically and check whether a cloud service keeps recoverable versions or simply synchronizes deletions. Keep at least one copy isolated from the routine mistakes that could affect your working library. [6]

23. Review Your Older Photos For New Insights
Your old photographs are a record of your development, so do not let them disappear into an archive.
Choose a shoot from six months or a year ago and review it with your current knowledge. Look for recurring problems:
- missed focus;
- inconsistent exposure;
- distracting backgrounds;
- weak subject placement;
- unnecessary cropping;
- poor color balance.
You may also discover images you previously overlooked. Better editing skills, improved software, or simply a more experienced eye can reveal potential that was not obvious when the photograph was first taken. Revisiting old work is therefore more than nostalgia—it is one of the most effective photography tips for identifying patterns in your own mistakes.

24. Learn From Other Photographers
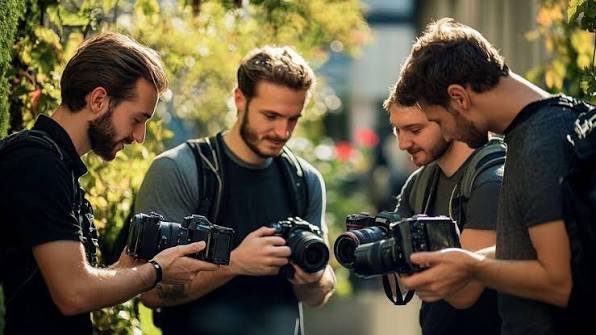
Looking at the work of experienced photographers can be one of the most effective photography tips for beginners because it helps develop a better understanding of how strong images are created. Instead of simply admiring a beautiful photograph, try to figure out the choices that made the image successful.
When you find a photo that catches your attention, examine the lighting, subject, composition, depth of field, and camera position. Notice what your eyes see first and why. For example, a portrait with a blurred background may have been shot with a wide aperture such as f/2.8, while a landscape with everything in focus may have required a narrower aperture and a carefully chosen focus point.
After analyzing an image, try applying the same idea to a different subject. Photograph a person using a similar lighting direction, recreate a comparable composition with a nearby building, or experiment with a similar camera angle. This turns inspiration into practical experience.
Photography communities, workshops, books, online courses, and constructive critiques can all provide useful feedback. The goal is not to reproduce another photographer’s style. Instead, use these professional photography tips to understand the reasoning behind successful images and gradually incorporate those techniques into your own visual style.
>>> See more:
- How To Master Portraits Photo Editing: 10 Best Tools, Tips & Step-By-Step Guide
- A Complete Guide to Beautiful Newborn Photo Editing
- How To Make Photos Look Like Film: A Complete Beginner’s Guide
25. Identify Your Weaknesses And Keep Improving
The final step in these photography tips for beginners is to stop practicing only what already feels comfortable. Review your last 50–100 photographs and identify repeated problems. If many are blurry, practice shutter speed and camera stability. If skies are frequently overexposed, study the histogram and exposure compensation. If portraits look flat, practice light direction. If compositions feel cluttered, spend a week working only on simplification.
Turn each weakness into a measurable assignment. For example:
- Problem: Portrait backgrounds are distracting.
- Goal: Photograph 20 portraits using cleaner backgrounds.
- Practice: Change subject-to-background distance and shooting position.
- Review: Compare the 20 images and identify which setup created the strongest separation.
That is how photography tips become actual photography skills: identify the problem, isolate the variable, practice deliberately, and review the results.
How to Take Better Photos With Your Phone
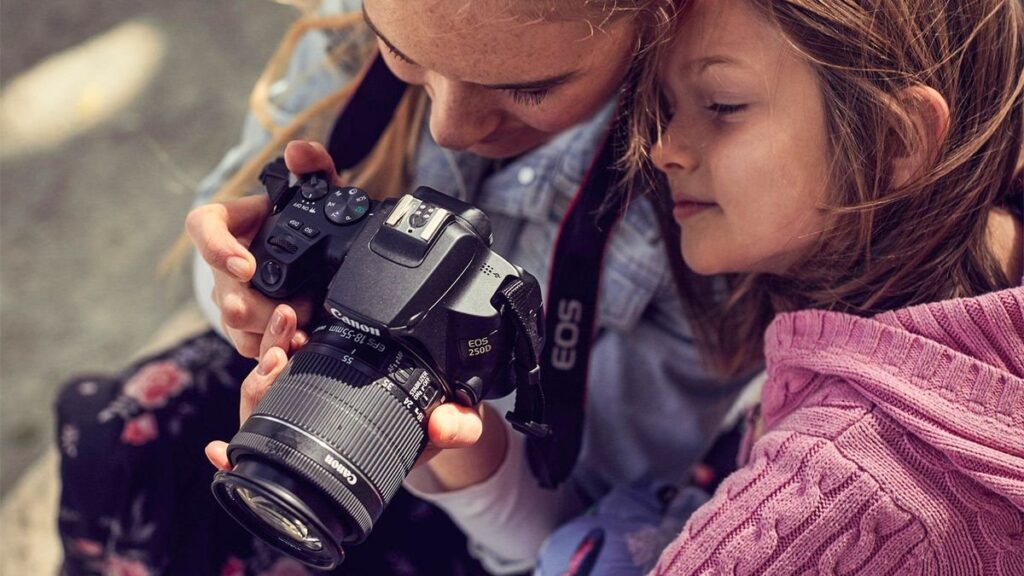
The same priorities—light, subject, focus, framing, and timing—apply to phone photography. Begin with the standard camera mode, then use optional modes when they solve a specific problem.
Set Focus and Exposure Intentionally
Clean the lens, tap the subject to set focus, and adjust exposure if a face looks too dark or important highlights are losing detail. On supported iPhone camera modes, Apple documents focus/exposure adjustment, locking, grid and level controls. Other phones may label these differently, so check the controls for your model. [4]
Review Portrait and Low-Light Modes
Inspect portrait-mode edges around hair, glasses and fine objects before sharing. For dark static scenes, support the phone and keep it still through the capture. A moving subject may still blur during a longer exposure; improve the light or choose a different approach rather than assuming a night mode will freeze movement.
Quick Photo Tips for Common Shooting Problems
Use the visible problem to choose your next adjustment. The table below is a troubleshooting guide, not a guarantee that every damaged image can be repaired.
| Problem | Check first | What to try |
| Blurred background and subject | Camera shake or focus error? | Support the camera, check the focus point, and reassess shutter speed. |
| Moving subject blurred | Subject motion | Try a faster shutter speed; adjust aperture/ISO as needed. |
| White clothing lacks texture | Important highlights clipped? | Reduce exposure where possible and check the source file. |
| Subject hard to notice | Background or framing clutter | Change position, simplify the frame or crop intentionally. |
| Unnatural skin color | Mixed lighting or white balance | Change the light or adjust white balance; inspect local casts. |
| Noisy low-light photo | Available light and exposure | Add usable light or stabilize a static shot; balance noise reduction against detail. |
Put These Photography Tips and Tricks Into Practice
Choose one subject near a window and take a baseline photograph. Make a second frame after clearing the background, a third after changing your angle, and a fourth after adjusting the light. Keep the camera and subject otherwise consistent. Compare the images at the same size and record which change helped most.
For the next session, repeat the exercise with focus or subject motion. Judge progress by whether you can explain the difference between the frames. This is a suggested practice exercise, not a measured DIGI-TEXX client case.
FAQs About Photography Tips
What Are The 7 Basics Of Photography?
A useful beginner checklist covers aperture, shutter speed, ISO, exposure, focus, composition, and lighting. There is no single universal list of exactly seven basics; these are seven areas you can practice to improve sharpness, brightness, depth, and visual clarity. [1][2]
What Are 7 Basic Tips For Taking Good Photographs?
Seven simple tips for taking better photographs include:
- Get closer to your subject to make the main subject stand out.
- Keep the background clean to avoid distracting elements.
- Experiment with different angles to create more interesting perspectives.
- Look for light that suits the subject; open shade or diffused window light can be useful starting points.
- Choose a clear focal point so viewers know where to look.
- Keep the camera steady to prevent unwanted blur.
- Take multiple shots to increase the chance of capturing the best image.
How Can I Take Better Photos Without Buying a New Camera?
Start by improving light, camera position, background and focus. Compare two frames after changing just one of those factors. Upgrade equipment when you can identify a specific limitation, such as autofocus performance or a focal length you cannot achieve.
Why Are My Photos Blurry?
Check whether the camera moved, the subject moved, or the focus landed in the wrong place. Support the camera for camera shake, use an appropriate shutter speed for subject movement, and check the focus point for missed focus. A tripod alone cannot freeze a moving person.
What Camera Mode Should a Beginner Use?
Auto mode can help you concentrate on light and composition. Where available, aperture priority lets you practice depth of field, while shutter priority helps you explore motion. Check the camera’s resulting settings and image instead of assuming manual mode is always better.
How Do I Take Better Photos in Low Light?
Find more usable light, support the camera for static scenes, and choose a shutter speed appropriate for any movement. Raise ISO when needed to maintain that shutter speed, then inspect noise and detail. A sharp photograph with some noise may serve the moment better than a smoother but blurred frame.
Can Editing Fix a Bad Photo?
Editing can improve crop, white balance, exposure and distractions, but it cannot reliably recreate every missing detail or repair every focus error. Start with the strongest source image and keep edits separate from the original. RAW provides more adjustment flexibility when your device supports it. [5]
Keep Practicing—and Refine Your Best Images
Hopefully, the photography tips shared by DIGI-TEXX have given you practical ideas to improve your shooting skills and greater confidence behind the camera. Keep practicing, experiment with different approaches, and let each photo become an opportunity to learn something new.
If your project needs consistent post-production across a large set of images, explore DIGI-TEXX’s photo editing services. Its published services include color correction, object removal and background enhancement. Share representative files, reference edits and output requirements, then request a sample and a scoped quotation. [7]
DIGI-TEXX Contact Information:
🌐 Website: https://digi-texx.com/
📞 Hotline: +84 28 3715 5325
✉️ Email: [email protected]
🏢 Address:
- Headquarters: Anna Building, QTSC, Trung My Tay Ward
- Office 1: German House, 33 Le Duan, Saigon Ward
- Office 2: DIGI-TEXX Building, 477-479 An Duong Vuong, Binh Phu Ward
- Office 3: Innovation Solution Center, ISC Hau Giang, 198 19 Thang 8 street, Vi Tan Ward
Reference:
[1] Adobe — The exposure triangle — https://blog.adobe.com/en/publish/2022/09/19/capturing-light-power-exposure-triangle
[2] University of Arkansas — Tips for taking great photos — https://brand.uark.edu/visual-media/tips-for-taking-great-photos.php
[3] Nikon — Let the sun shine in — https://www.nikonusa.com/learn-and-explore/c/tips-and-techniques/let-the-sun-shine-in
[4] Apple — Use iPhone camera tools to set up your shot — https://support.apple.com/en-ie/guide/iphone/iph3dc593597/ios
[5] Adobe — When to use raw vs. JPEG — https://www.adobe.com/us/learn/lightroom-cc/web/raw-vs-jpeg
[6] Library of Congress — Keeping personal digital photographs — https://digitalpreservation.gov/personalarchiving/photos.html
[7] DIGI-TEXX — Professional photo editing services — https://digi-texx.com/image-processing-services/photo-editing-services/
[8] Penn State — Lesson 4: Shutter speed/aperture/ISO — https://sites.psu.edu/photo100online/lesson-4-exposure/